Now this is my opinion on what to remove and protect. It does not mean you need to follow it to the letter. Please see this more as a general things to do list and areas of interest to point you in the correct direction. While the OP's post came through I was funnily enough in the process of protecting a MK 2.5. So while taking pics for the owner for his proof for any resale, I took a lot of pics of of the process for others to follow on their drives or garage if they are doing it themselves. Or seeing where and what has been protected when you get pics from these undersealing /protection specialists come through to you after trusting them with your pride and joy. When handing the keys over the term " you pay for what you get" is 90% correct so be careful. Unlike the company in this thread that charged high end dollar for low end work, so you need to have you wits about you. Check it before taking the keys back, it is your right to do so. If you not happy say so and get them to put it right before handing over any hard earned cash, because thats all they want and all they see you as..
Its your roadster, your money and you are paying for a job and service, they are not doing it for free to help you.
These pics are of a MK 2.5 , it is the same for the MK 1's although the front rails are not made of cheese, so injecting with cavity wax is the route to go with the MK 1's.
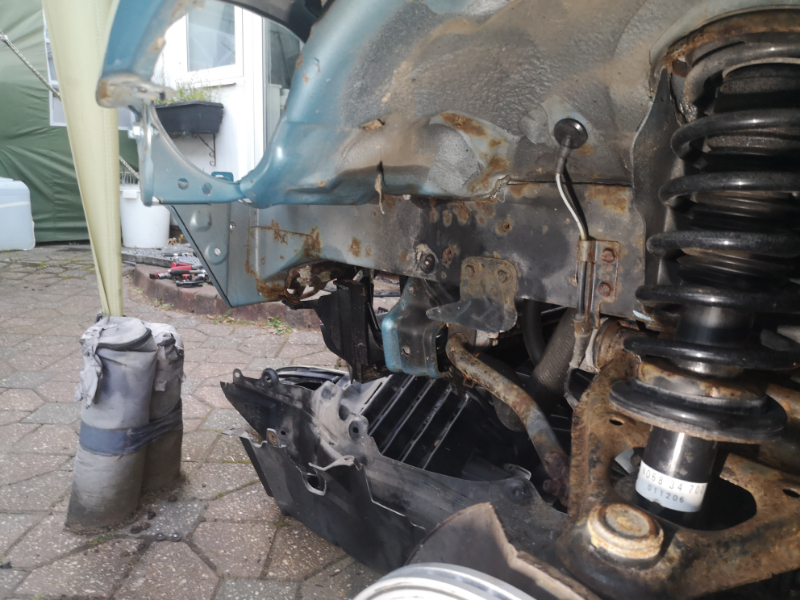
*****DO NOT APPLY ANY PROTECTION PRODUCTS TO A WET CAR OR WITH DIRT AND LOOSE RUST/PAINT******So the first thing is to get it up in the air, wheel chocks, jack and axle stands, on solid ground and flat, then remove the...
Wheels....
Under braces front and back etc...
Under body heat shields....
Front and rear arch liners/plastic shields...
Fuel filter cover...
Under tray......
front bumper..
head lights and location lugs....
front impact bumper...
front spikes....
Air guide if possible....
Rear lights...
Rear bumper....
Drop the zorst off the 3 x rear hangers...
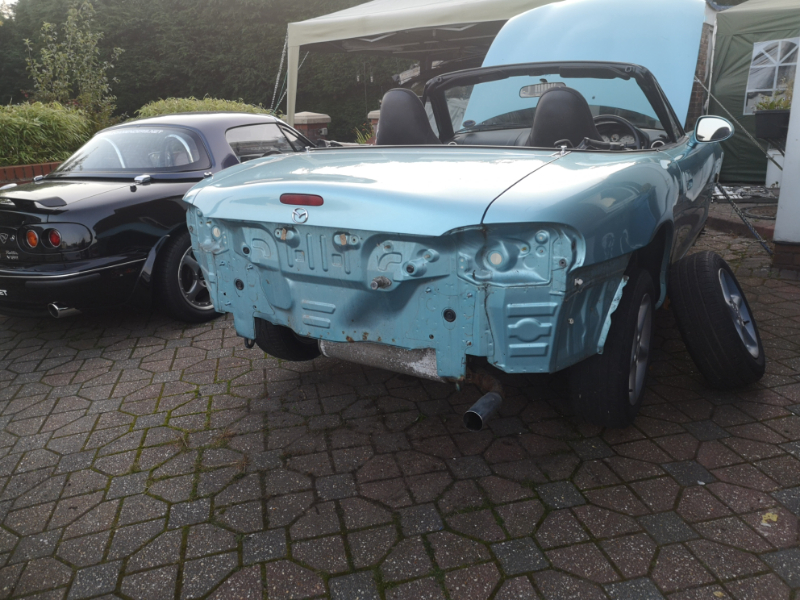
Undo the front wings...2 x 10mm bolts at the bottom and a 10mm nut behind the inner wing( further in from the indicator
)...
There is less to remove on the MK 1, as you go through the Marks it gets more and more until you end with the MK 4 at the minute with a skip load of plastic clips and panels....
Put all fixings in a container safe for reusing for fitting everything back on, because it is just a big jigsaw puzzle. You will also need to remove the the two bolts on the wings on each side, 10mm head bolts that hold the front wing in place underneath at the bottom of the sill, and just undo the 10mm nut that is behind the wing half way up towards the door, nearly in line with the wing indicator...

- IMG_20190825_195722.jpg (627.9 KiB) Viewed 8566 times

- IMG_20190825_195812.jpg (514.62 KiB) Viewed 8566 times
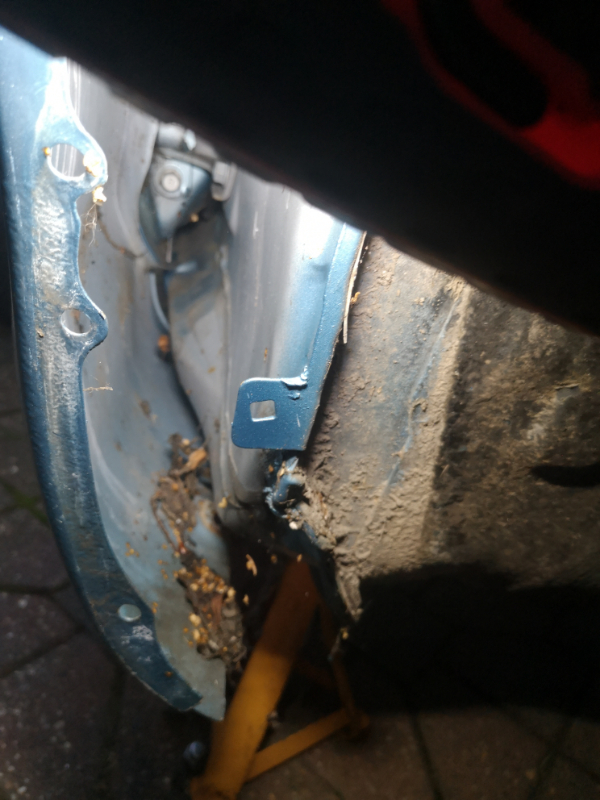
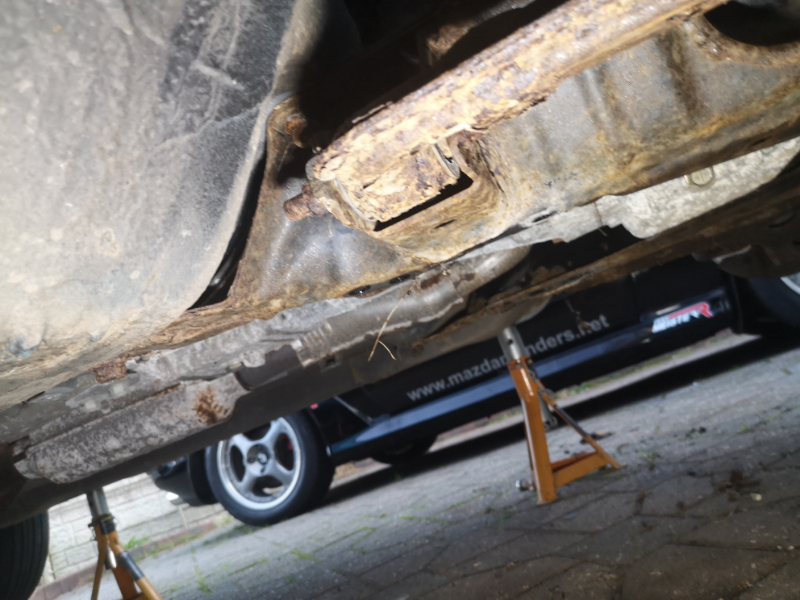
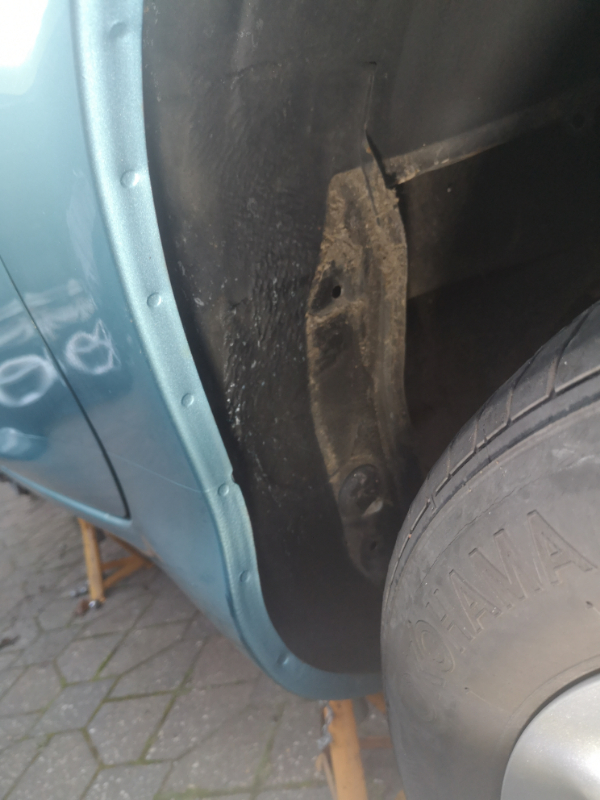
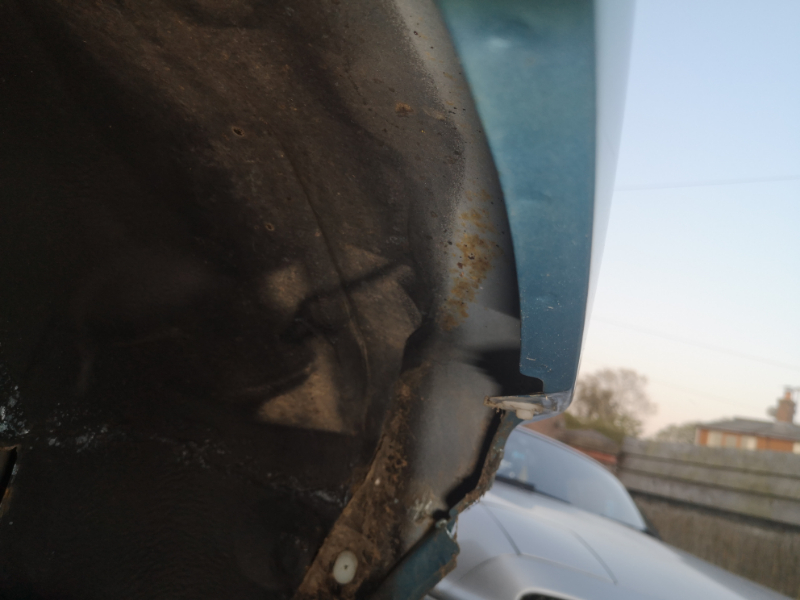
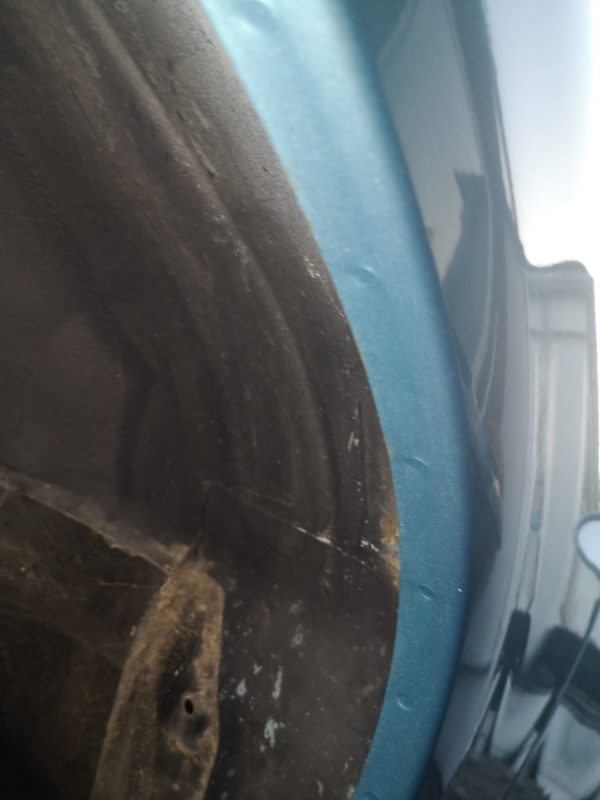
So once you have stripped it down, time to have a proper look at what you have....

- IMG_20190825_195749.jpg (367.59 KiB) Viewed 8566 times
- IMG_20190825_195812.jpg (514.62 KiB) Viewed 8566 times

- IMG_20190825_195801.jpg (358.32 KiB) Viewed 8566 times

- IMG_20190825_195818.jpg (410.64 KiB) Viewed 8566 times

- IMG_20190825_195848.jpg (486.34 KiB) Viewed 8566 times
- IMG_20190825_195857.jpg (510.85 KiB) Viewed 8566 times

- IMG_20190825_195913.jpg (423.94 KiB) Viewed 8566 times

- IMG_20190825_195918.jpg (438.37 KiB) Viewed 8566 times

- IMG_20190825_195922.jpg (417.66 KiB) Viewed 8566 times

- IMG_20190825_195928.jpg (505.13 KiB) Viewed 8566 times
- IMG_20190825_195935.jpg (548.92 KiB) Viewed 8566 times

- IMG_20190825_195949.jpg (431.08 KiB) Viewed 8566 times

- IMG_20190825_195952.jpg (448.1 KiB) Viewed 8566 times
- IMG_20190825_195956.jpg (443.63 KiB) Viewed 8566 times

- IMG_20190825_200001.jpg (441.19 KiB) Viewed 8566 times

- IMG_20190825_200034.jpg (512.39 KiB) Viewed 8566 times

- IMG_20190825_200038.jpg (426.94 KiB) Viewed 8566 times

- IMG_20190825_200041.jpg (456.39 KiB) Viewed 8566 times

- IMG_20190825_200049.jpg (451.47 KiB) Viewed 8566 times

- IMG_20190825_200055.jpg (504.11 KiB) Viewed 8566 times

- IMG_20190825_200101.jpg (521.79 KiB) Viewed 8566 times

- IMG_20190825_200107.jpg (564.96 KiB) Viewed 8566 times

- IMG_20190825_200113.jpg (506.33 KiB) Viewed 8566 times

- IMG_20190825_200121.jpg (525.44 KiB) Viewed 8566 times
- IMG_20190825_200142.jpg (498.64 KiB) Viewed 8566 times

- IMG_20190825_200153.jpg (553.6 KiB) Viewed 8566 times

- IMG_20190825_200159.jpg (459.01 KiB) Viewed 8566 times

- IMG_20190825_200203.jpg (473.59 KiB) Viewed 8566 times
- IMG_20190825_200213.jpg (457.27 KiB) Viewed 8566 times

- IMG_20190825_200217.jpg (467.57 KiB) Viewed 8566 times

- IMG_20190825_200224.jpg (484.21 KiB) Viewed 8566 times

- IMG_20190825_200301.jpg (451.41 KiB) Viewed 8566 times

- IMG_20190825_200305.jpg (409.55 KiB) Viewed 8566 times
- IMG_20190825_200312.jpg (480.67 KiB) Viewed 8566 times

- IMG_20190825_200335.jpg (484.25 KiB) Viewed 8566 times

- IMG_20190825_200348.jpg (530.05 KiB) Viewed 8566 times

- IMG_20190825_200354.jpg (522.99 KiB) Viewed 8566 times

- IMG_20190825_200358.jpg (539.35 KiB) Viewed 8566 times

- IMG_20190825_200402.jpg (425.27 KiB) Viewed 8566 times
- IMG_20190825_200411.jpg (402.81 KiB) Viewed 8566 times

- IMG_20190825_200414.jpg (334.09 KiB) Viewed 8566 times

- IMG_20190825_200428.jpg (361.59 KiB) Viewed 8566 times
- IMG_20190825_200434.jpg (321.18 KiB) Viewed 8566 times

- IMG_20190825_200450.jpg (415.39 KiB) Viewed 8566 times

- IMG_20190825_200453.jpg (437.72 KiB) Viewed 8566 times
- IMG_20190825_200456.jpg (394.87 KiB) Viewed 8566 times
- IMG_20190825_200544.jpg (344.18 KiB) Viewed 8566 times

- IMG_20190825_200548.jpg (391.14 KiB) Viewed 8566 times

- IMG_20190825_200551.jpg (404.13 KiB) Viewed 8566 times
A good clean is needed next to get rid of all dirt and let it all dry, please do not use a very high powered jet wash. It will do more harm than good, a cheapy small one from the likes of aldi, lidl etc are perfect for this...
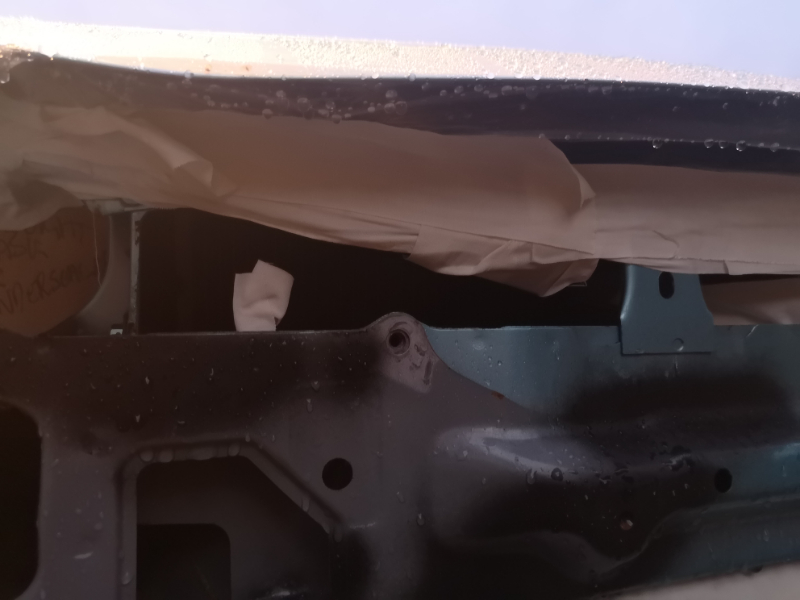
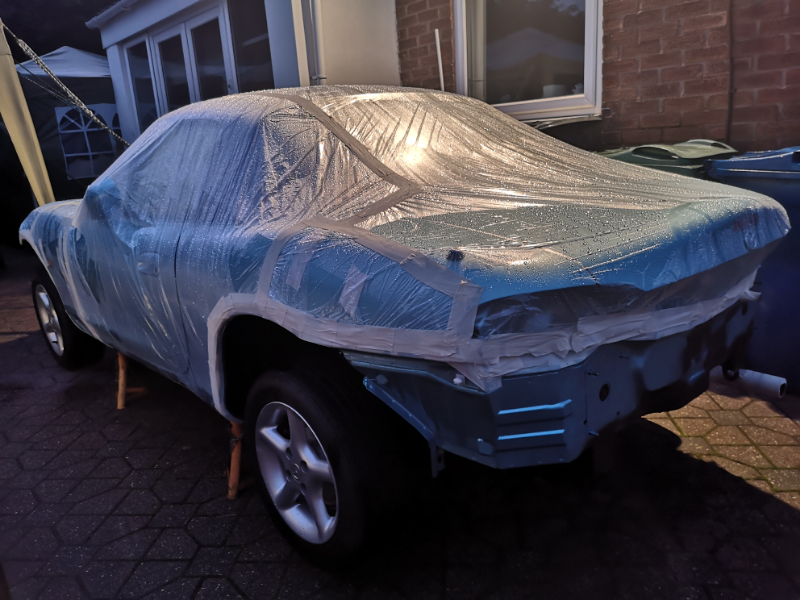
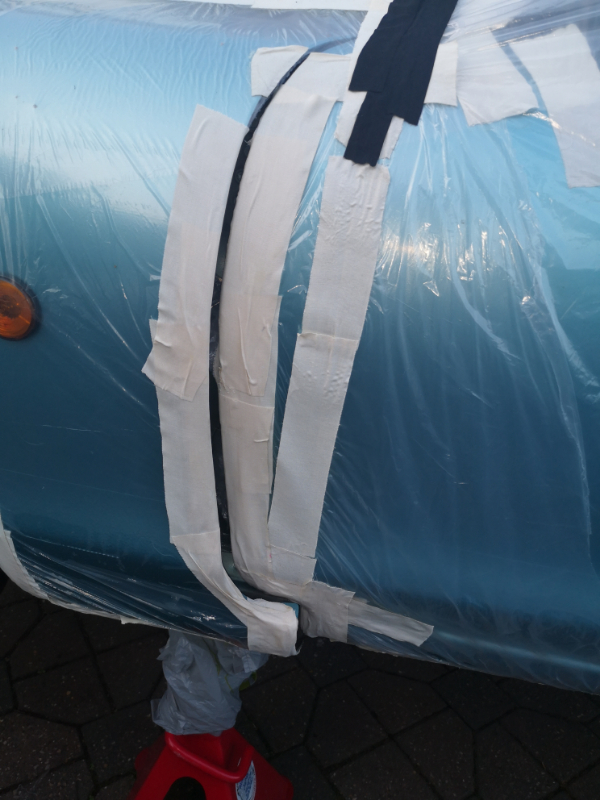
Now you do not need to do this but I wrap the roadster, which is simply to stop any over spray of underseal flying onto the paint...please note the masking line on the wheel arches, there is a reason for this, you are sealing the lips all the way around...back...lip...front, but that choice is yours...

- IMG_20190909_194832.jpg (426.3 KiB) Viewed 8566 times

- IMG_20190909_194842.jpg (344.51 KiB) Viewed 8566 times
- IMG_20190909_194846.jpg (229.62 KiB) Viewed 8566 times

- IMG_20190909_194854.jpg (336.71 KiB) Viewed 8566 times

- IMG_20190909_194902.jpg (279.48 KiB) Viewed 8566 times

- IMG_20190909_194914.jpg (315.12 KiB) Viewed 8566 times

- IMG_20190909_194952.jpg (386.46 KiB) Viewed 8566 times
- IMG_20190909_195000.jpg (309.74 KiB) Viewed 8566 times

- IMG_20190909_195002.jpg (295.86 KiB) Viewed 8566 times

- IMG_20190909_195015.jpg (352.74 KiB) Viewed 8566 times

- IMG_20190909_195019.jpg (322.45 KiB) Viewed 8566 times

- IMG_20190909_195031.jpg (163.04 KiB) Viewed 8566 times

- IMG_20190909_195044.jpg (234.05 KiB) Viewed 8566 times

- IMG_20190909_195102.jpg (456.24 KiB) Viewed 8566 times

- IMG_20190909_195106.jpg (344.71 KiB) Viewed 8566 times

- IMG_20190909_195117.jpg (310.14 KiB) Viewed 8566 times

- IMG_20190909_195133.jpg (348.31 KiB) Viewed 8566 times

- IMG_20190909_195136.jpg (352.3 KiB) Viewed 8566 times
- IMG_20190909_195142.jpg (265.24 KiB) Viewed 8566 times

- IMG_20190909_195152.jpg (367.08 KiB) Viewed 8566 times

- IMG_20190909_195210.jpg (441.09 KiB) Viewed 8563 times

- IMG_20190909_195214.jpg (433.38 KiB) Viewed 8563 times

- IMG_20190909_195225.jpg (449.98 KiB) Viewed 8563 times

- IMG_20190909_195232.jpg (414.54 KiB) Viewed 8563 times

- IMG_20190909_195258.jpg (337.44 KiB) Viewed 8563 times

- IMG_20190909_195310.jpg (518.58 KiB) Viewed 8563 times

- IMG_20190909_195314.jpg (269.9 KiB) Viewed 8563 times

- IMG_20190909_195321.jpg (374.73 KiB) Viewed 8563 times

- IMG_20190909_195329.jpg (182.26 KiB) Viewed 8563 times

- IMG_20190909_195338.jpg (501.45 KiB) Viewed 8563 times
- IMG_20190909_195345.jpg (485.96 KiB) Viewed 8563 times

- IMG_20190909_195356.jpg (520.1 KiB) Viewed 8563 times

- IMG_20190909_195402.jpg (618.67 KiB) Viewed 8563 times

- IMG_20190909_195407.jpg (554.45 KiB) Viewed 8563 times

- IMG_20190909_195415.jpg (329.35 KiB) Viewed 8563 times

- IMG_20190909_195430.jpg (241.11 KiB) Viewed 8563 times

- IMG_20190909_195444.jpg (225.02 KiB) Viewed 8563 times
- IMG_20190909_195449.jpg (259.84 KiB) Viewed 8563 times
- IMG_20190909_195507.jpg (451.96 KiB) Viewed 8563 times

- IMG_20190909_195512.jpg (435.84 KiB) Viewed 8563 times

- IMG_20190909_195517.jpg (406.91 KiB) Viewed 8563 times

- IMG_20190909_195559.jpg (377.2 KiB) Viewed 8563 times

- IMG_20190909_195602.jpg (401.86 KiB) Viewed 8563 times
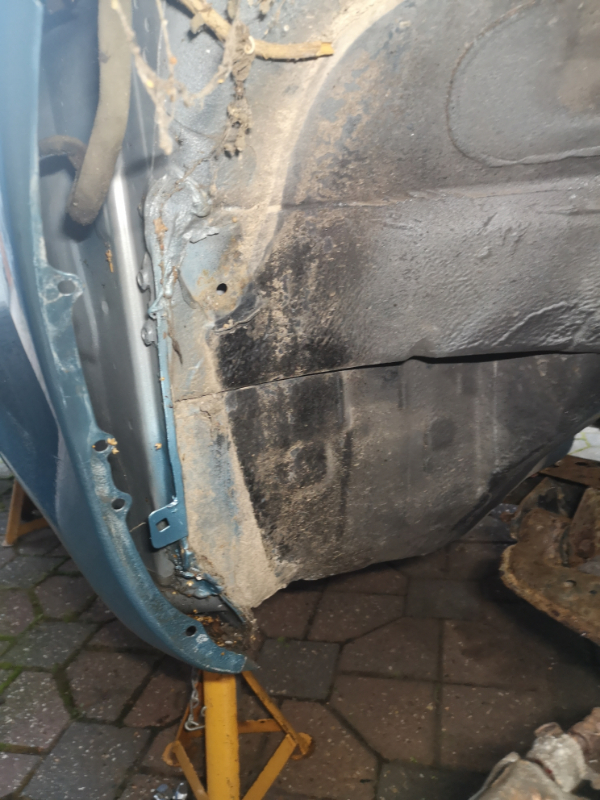
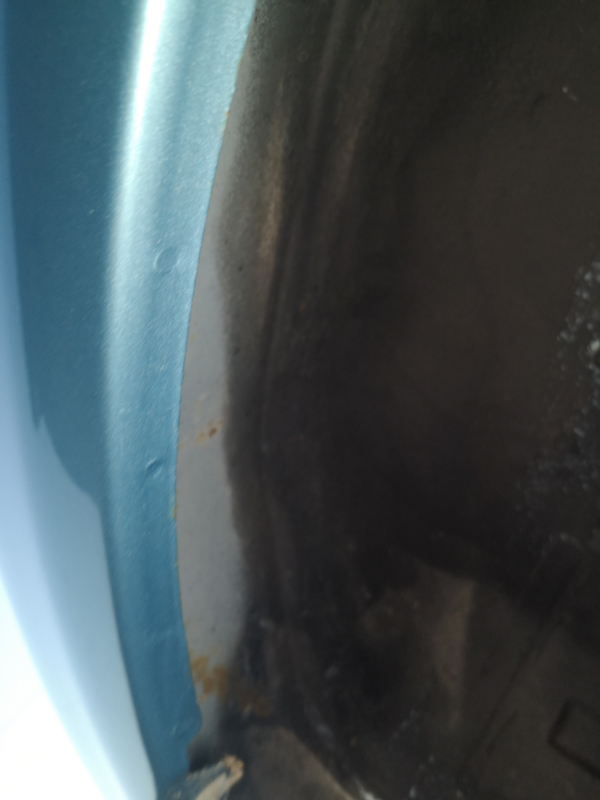
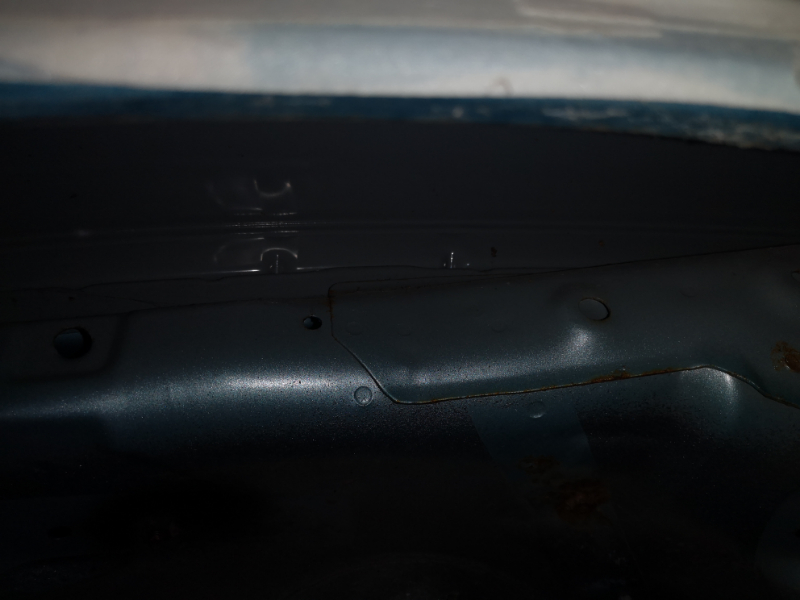
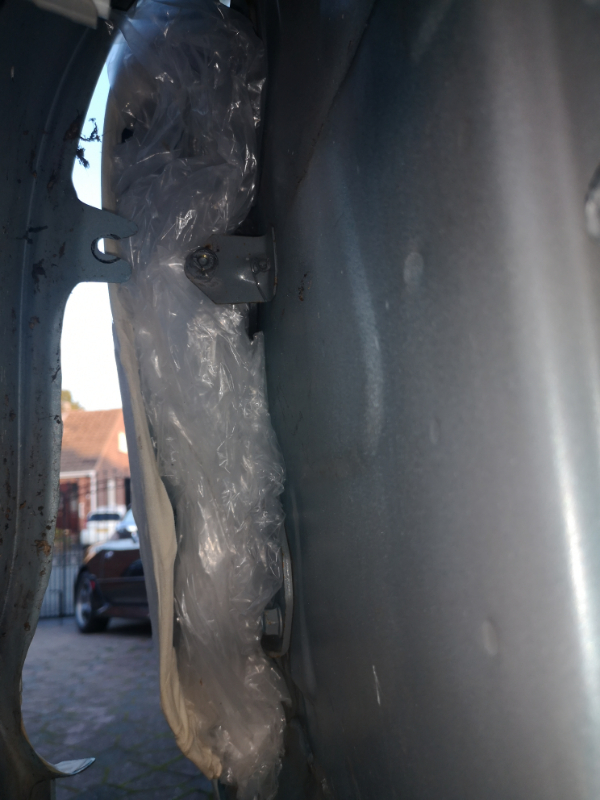
Now we can start looking at the surface rust... Attack it with what ever you can... In this case it was a grinder with a flappy disc, a number of wire brushes ,scraper for loose or flaking bits, sand paper, rust converter, spray paint( never leave bare metal) to prep it all ready for undersealing...
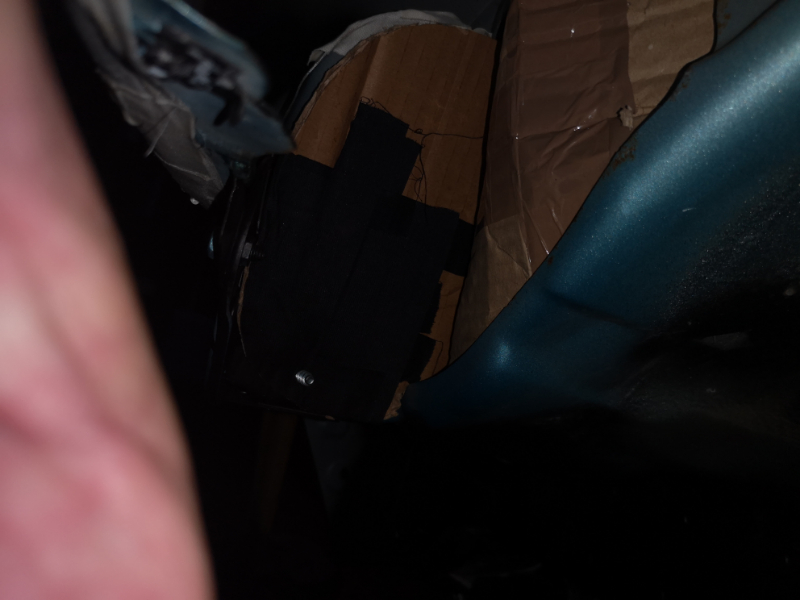
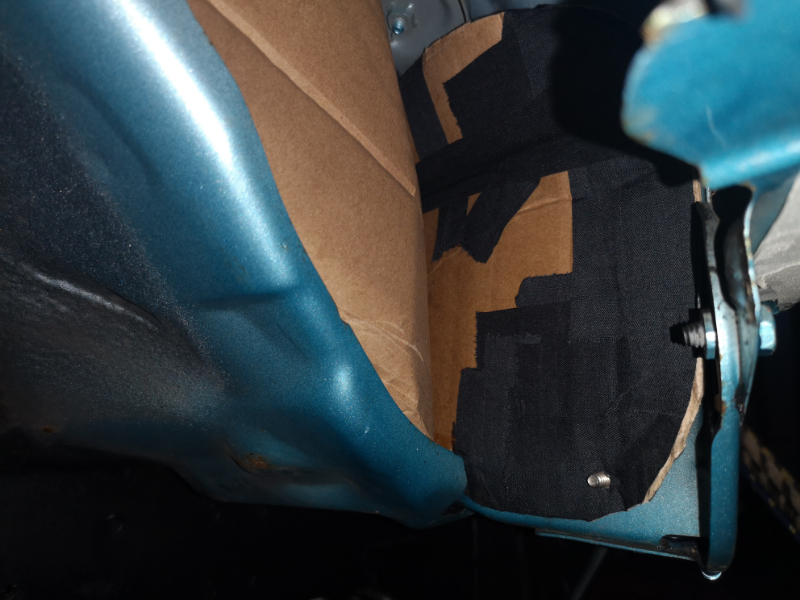
Then it is just a case of making sure we can pull the front open to be apply to get to the back of the wing and front sill section, you will also see that I have pushed some cover sheet behind the door to stop the underseal going everywhere when we apply it....

- IMG_20190919_180623.jpg (404.97 KiB) Viewed 8563 times

- IMG_20190919_184156.jpg (365.85 KiB) Viewed 8563 times
- IMG_20190919_184200.jpg (397.46 KiB) Viewed 8563 times

- IMG_20190919_184209.jpg (402.01 KiB) Viewed 8563 times

- IMG_20190919_184229.jpg (407.91 KiB) Viewed 8563 times

- IMG_20190919_184237.jpg (413.68 KiB) Viewed 8563 times
- IMG_20190919_184511.jpg (432.66 KiB) Viewed 8563 times

- IMG_20190919_184517.jpg (453.18 KiB) Viewed 8563 times

- IMG_20190919_184527.jpg (393.85 KiB) Viewed 8563 times

- IMG_20190919_184532.jpg (427.79 KiB) Viewed 8563 times

- IMG_20190920_194153.jpg (667.68 KiB) Viewed 8563 times

- IMG_20190921_145129.jpg (731.21 KiB) Viewed 8563 times
Now I am using a 50ltr aldi all singing all dancing air compressor and line, and does the job as a portable item really well, but not everyone has them. You can get the underseal in spray cans also for this. Now this is all being done on a drive way outside. So if i can hit this standard...so can you and save a car and save money...
What I will add is make sure you cover your drive/garage floor, cars near by etc etc....you will be surprised with just how far this stuff travels . A set of rag clothes, a hat, goggles and a mask, you will get covered in it and with out a mask it will attack your throat and chest 100%.
You should also note that I do cover the holes where the head lights were and the gaps in the inner wings to stop any unwanted underseal covering all in the engine bay. I also put a sheet in front of the rad to stop the rad getting hit. ( see pics)
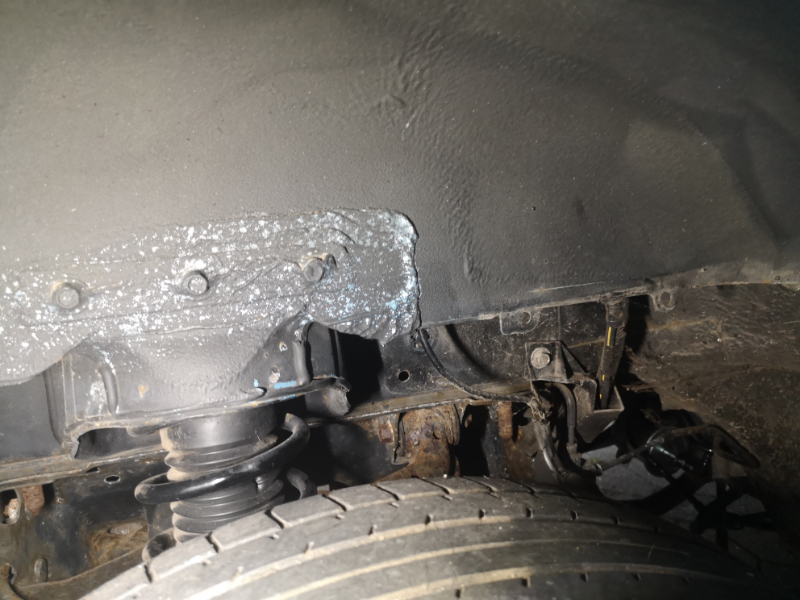
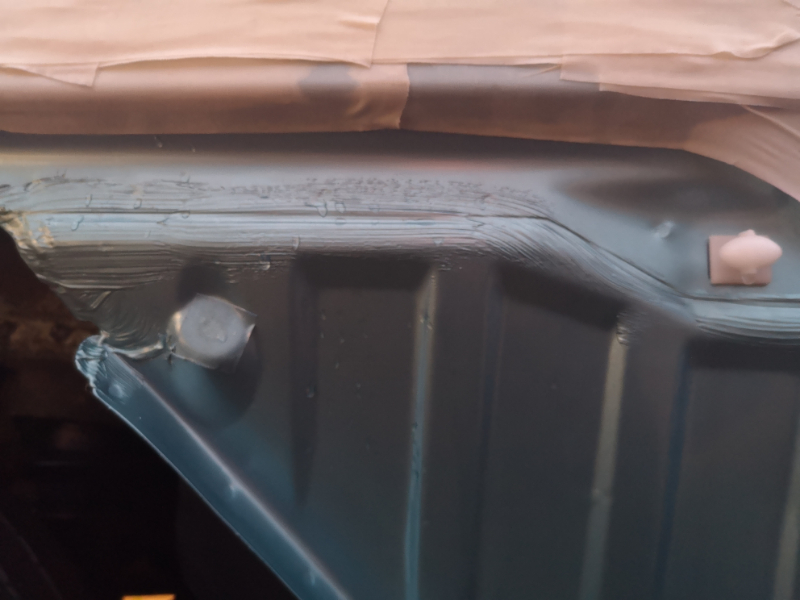
Ok lets get it on.... We will be using a air compressor, but even so if you are using spray cans, remember it is all directional so places can be missed, what i tend to do is once finished, go and have a brew for 45 minutes and get a bright LED light and nip back under, it will highlight any areas missed that need more stuff to be applied to...
Once the underseal is dry, a day or so depending on the time of years, you can get in there with the cavity wax. Now you will be shock on just where all this stuff will run out from, as the shells are spot welded not sealed which will bring home why this treatment is needed to slow down tin worm...
I hope you can see from the pics the areas to get into on the cavity wax... Strip the boot and get into the inners of the wheel arches where the condensation runs down to bare metal to attacks. Also pop those rear number plate lights out and inject all the way along that inner edge for the same reason the leading edge pop...condensation on bare metal ...
Now the rear sill section on the MK 2/2.5's can be accessed through the rear arch liner fixing clip holes. On the MK 1's go through the large rubber grommet, you will also need to get the full inner and outer sections of the rear inner sill by the B post. You must look carefully as nearly everyone makes the mistake of not doing this right and missing important sections in the B post. You will see the outer panel, mid section and inner section, a lot of people miss getting to the outer panel. You need to get your injecting straw in,over and down in there also as well as the inner, (see pics) the MK 1 and 2's mid section are shaped different so the MK 2's mid section sits about half way in that hole. The MK 1 mid section sits higher so you will need to get your head down to find it. Now if you do not go down between the mid and outer section to inject and only inject into the mid and inner sections as nearly everyone does, you have just wasted your time and money by not doing so, so don't looked shocked when it pops on the outside with tin worm.
Run along the sills where the kick plates were, and inject into every hole you can find underneath. The front section is prone to blowing also where it curves up from underneath from the jacking point up into the wheel arch. This is a box section that holds water, make sure you get in that, and inject into the bottom of the doors, this is also important as they suffer from the same fate as the boot lid seals popping.
The old oil containers are there to simply keep the plastic sheets in place, because when I came to do this on a good warm dry day, it set the challenge of being a very windy day....challenge excepted ....I won.

I hope the pics will help,as it is a pain getting pics while trying to do the job on your own, but we are here if you have any questions.
If you have found this guide to be useful, helpful or as helped you with your roadster with saving on garage costs , please consider making a donation to keep these gates open and available for others and so new info can still be added to carry on helping.
M-m