So there I am, at home, bad back - need to do some fettling, but daren't get under the car in case I can't get out. Think hamster, think...
Ah-ha... let's get creative and spend no money in the process. Time for a sitty down job.
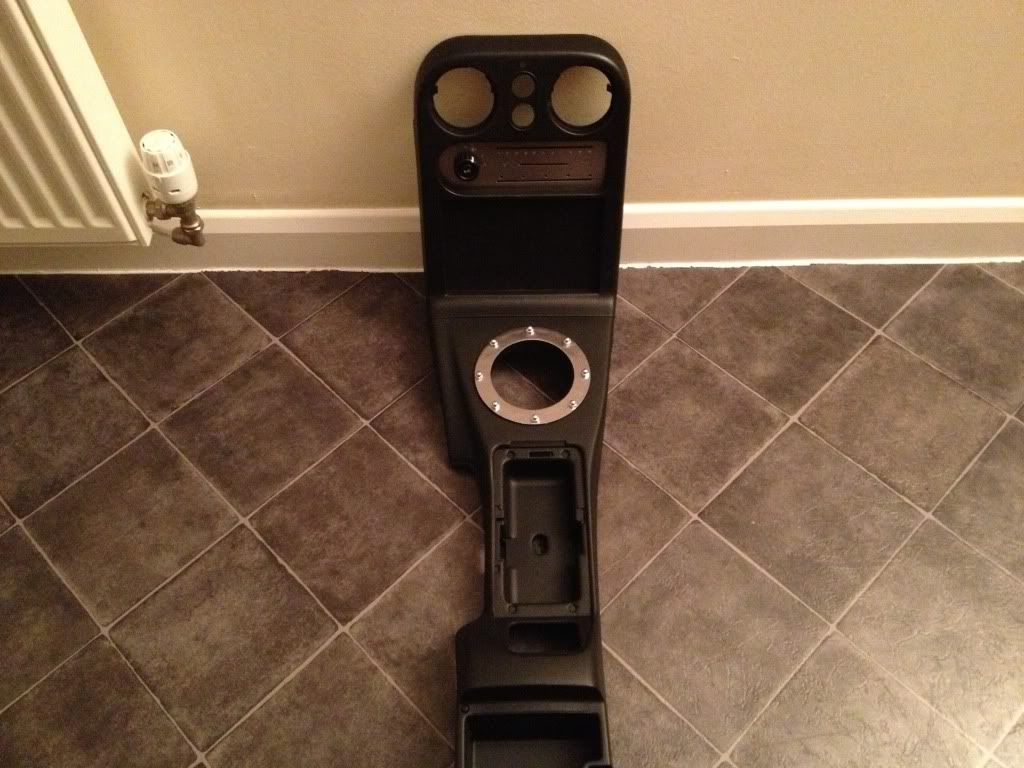
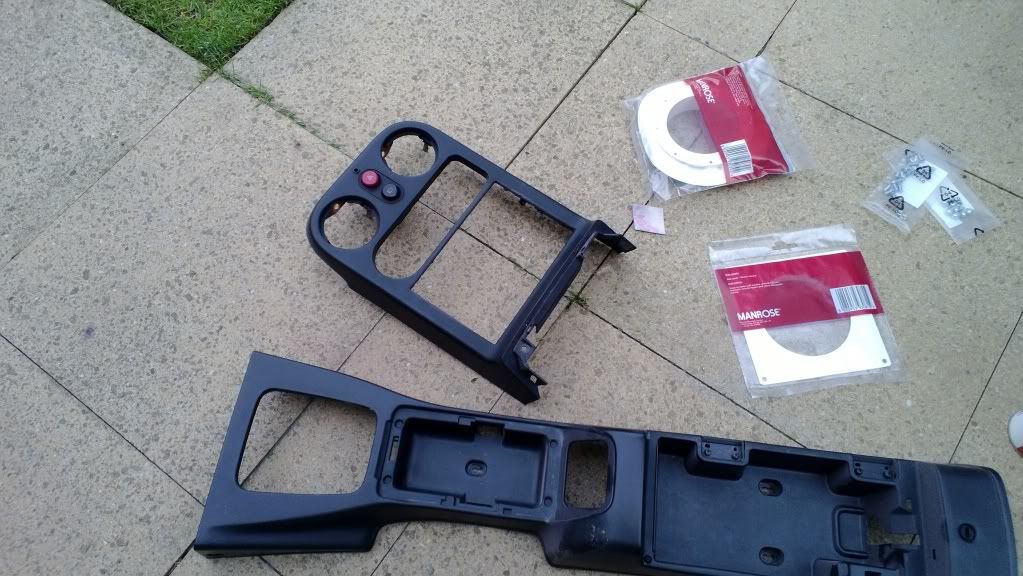
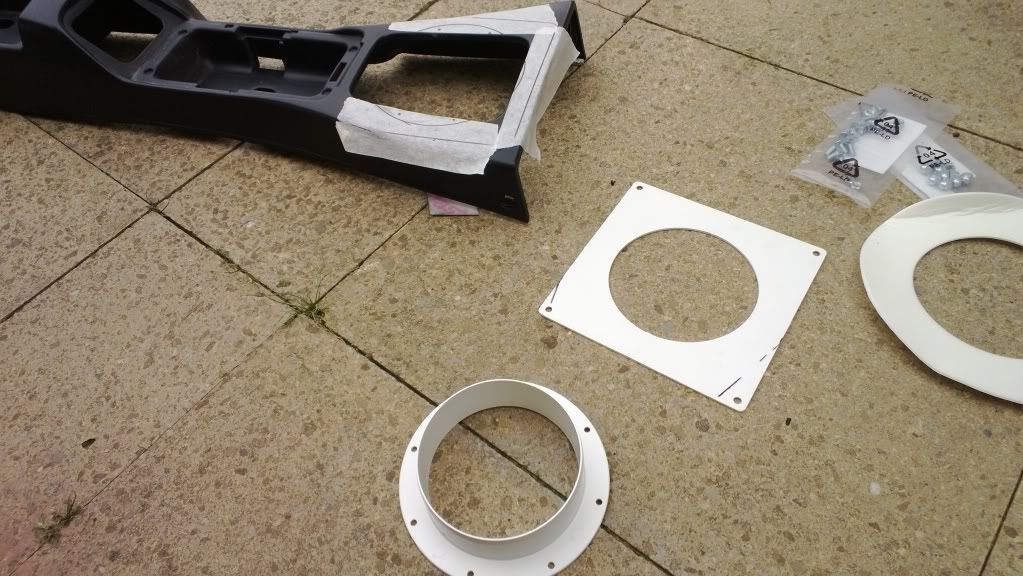
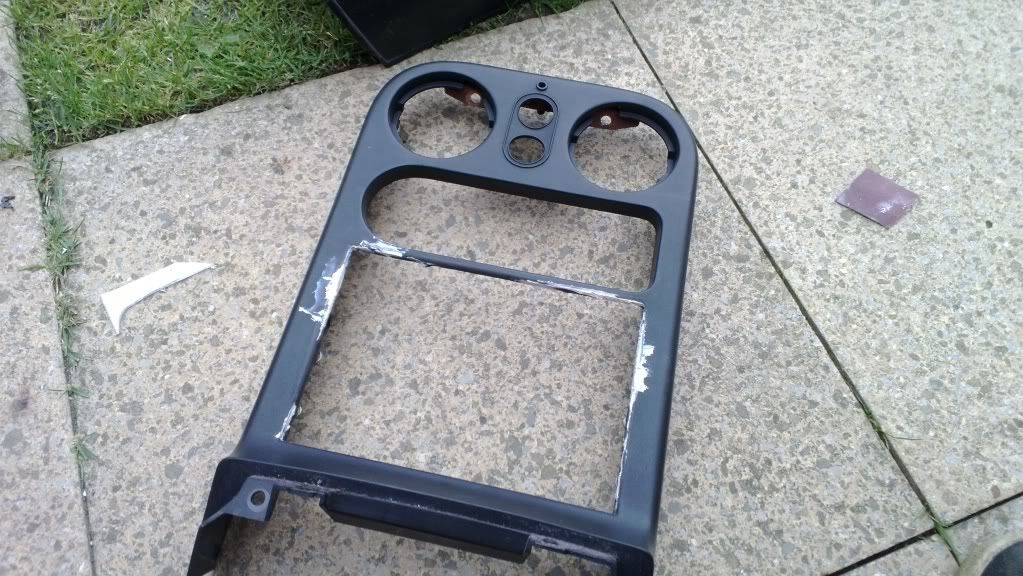
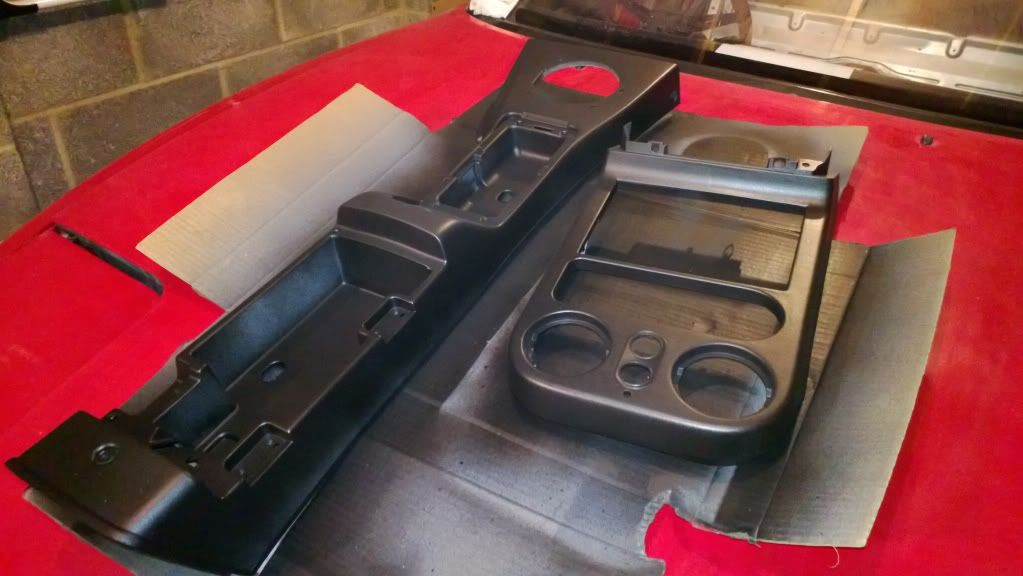
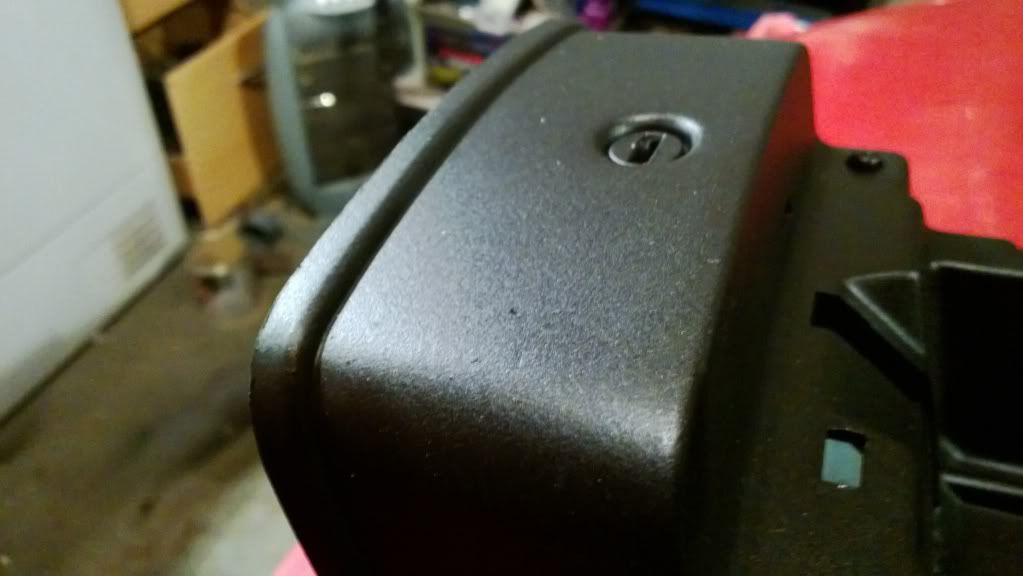
Take one centre console - bit tatty, one tombstone that has been hacked by careless previous owners out of car 19, and some tumble drier bits. Last year the tumble drier broke, so Mrs H decided...she wants when of those condensing type. Result, that means I didn't ahve to drill a hole in the wall to fit an extractor. The bits I bought previously from some diy place cost the princely sum of ÂŁ3 - a blanking cover thingy and a hole... with inflation, the lacklustre economy, I guess they are worth nowt now :)
Add some nuts and bolts and......
...let's get busy.
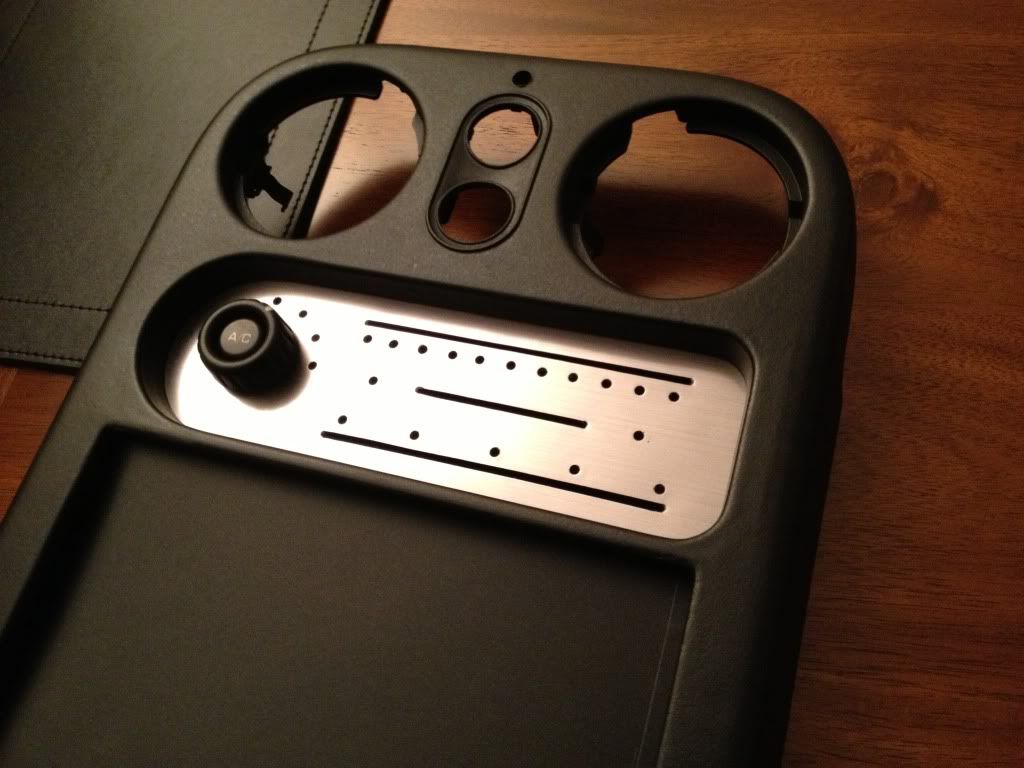
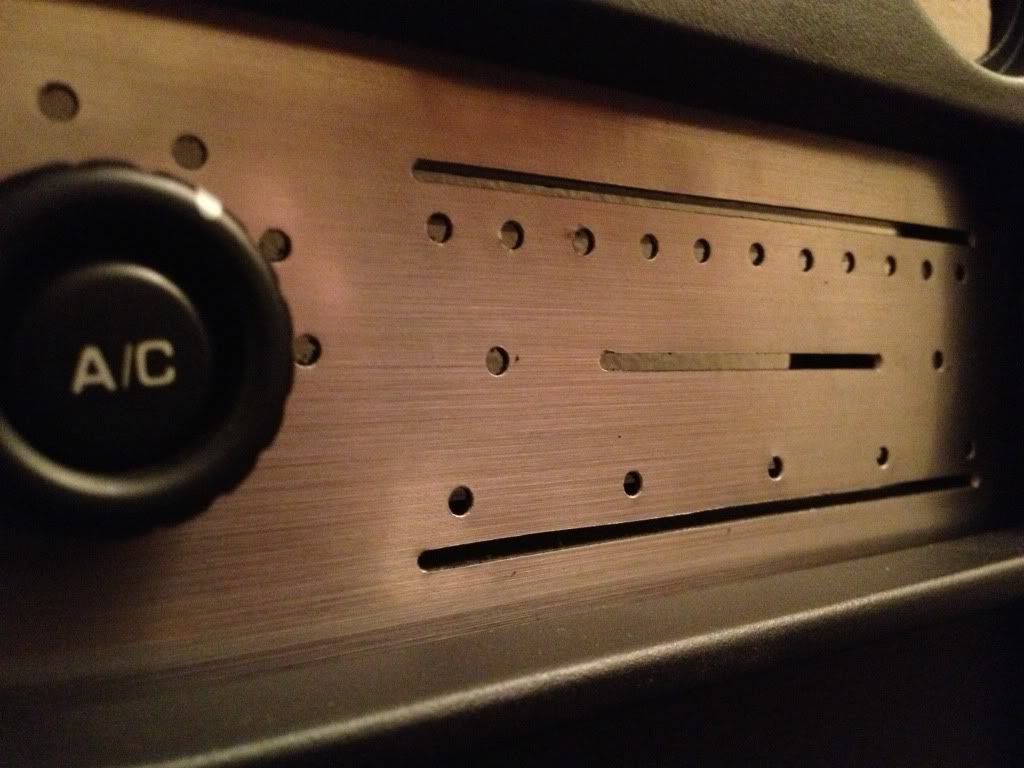
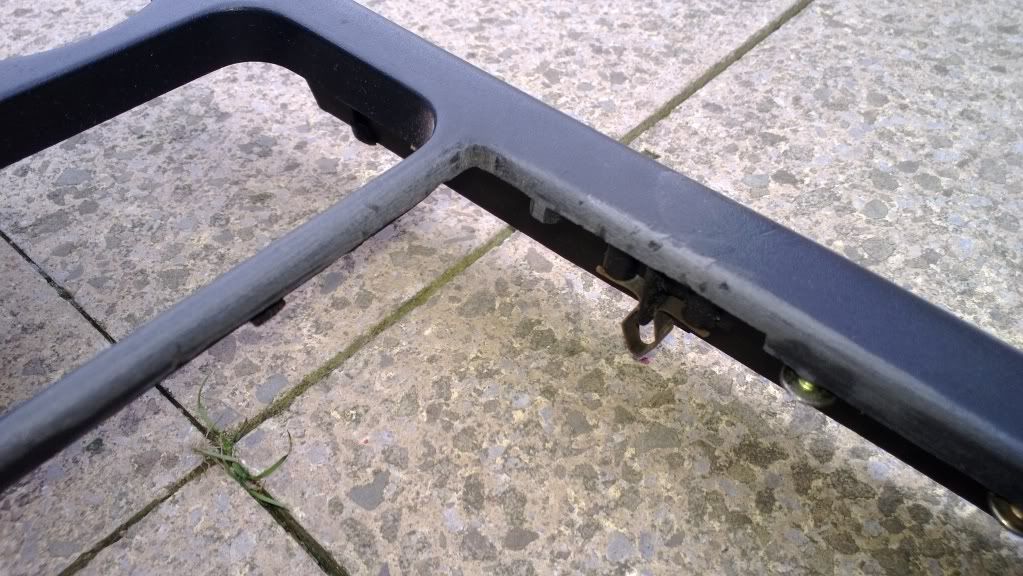
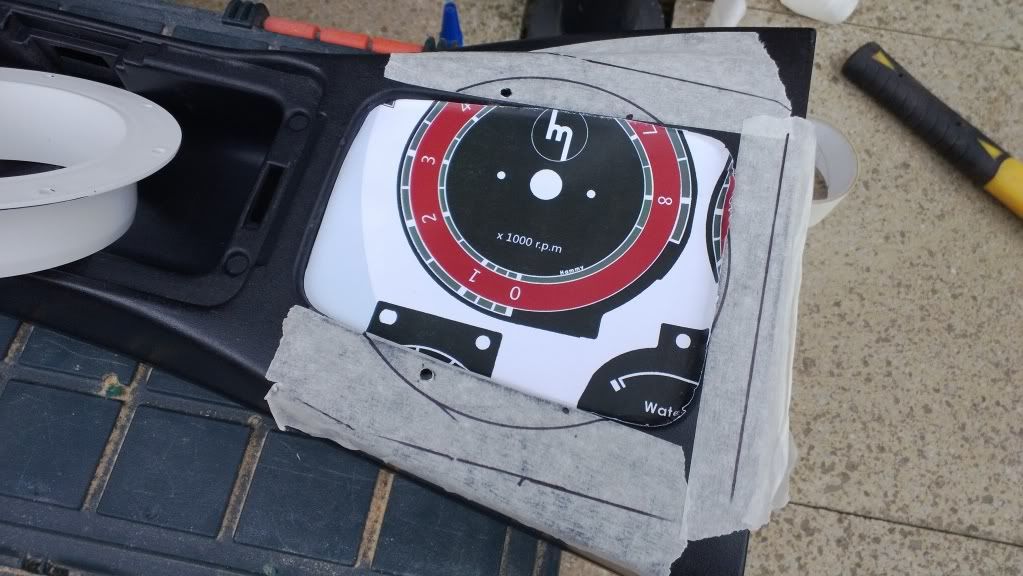
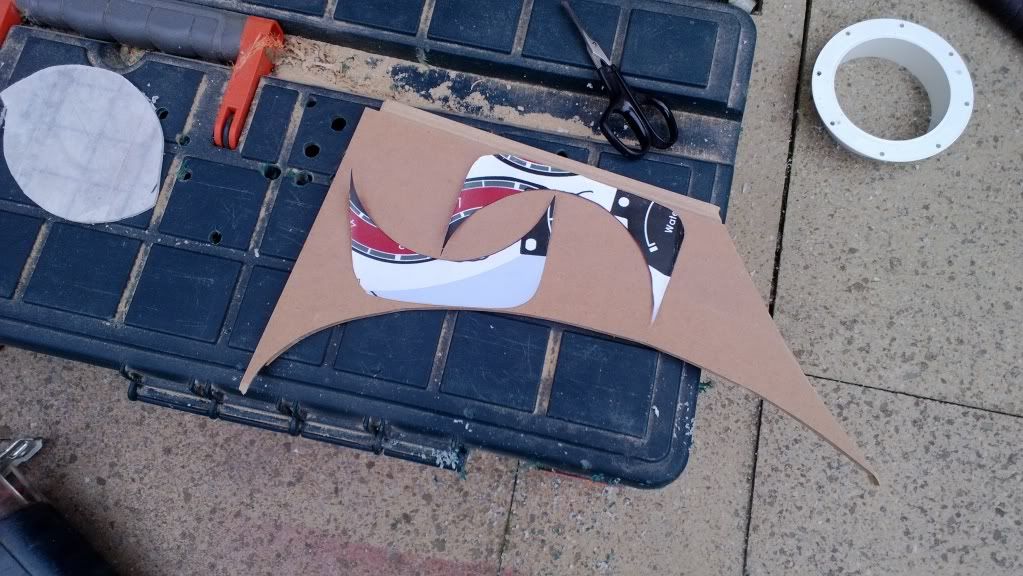
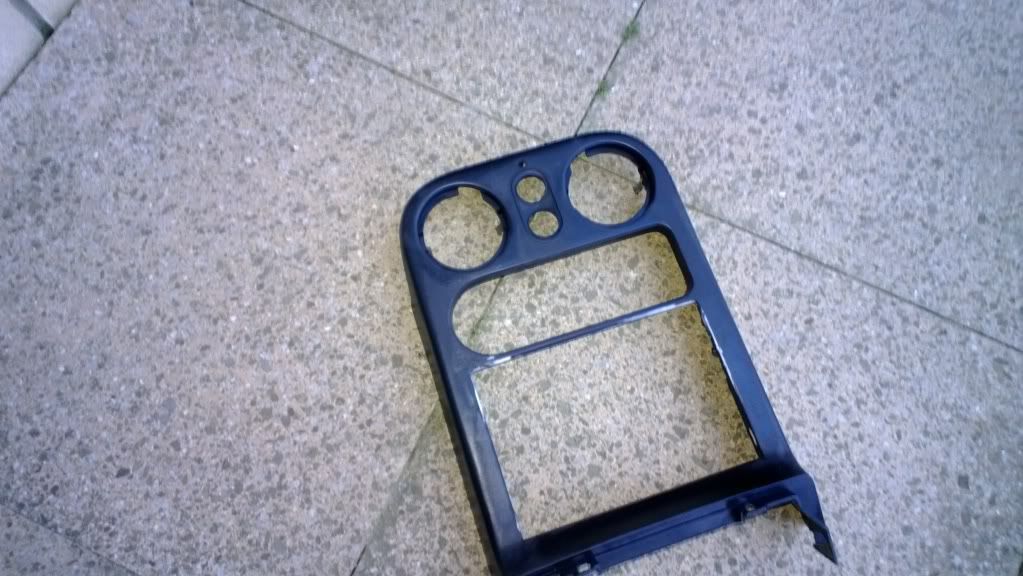
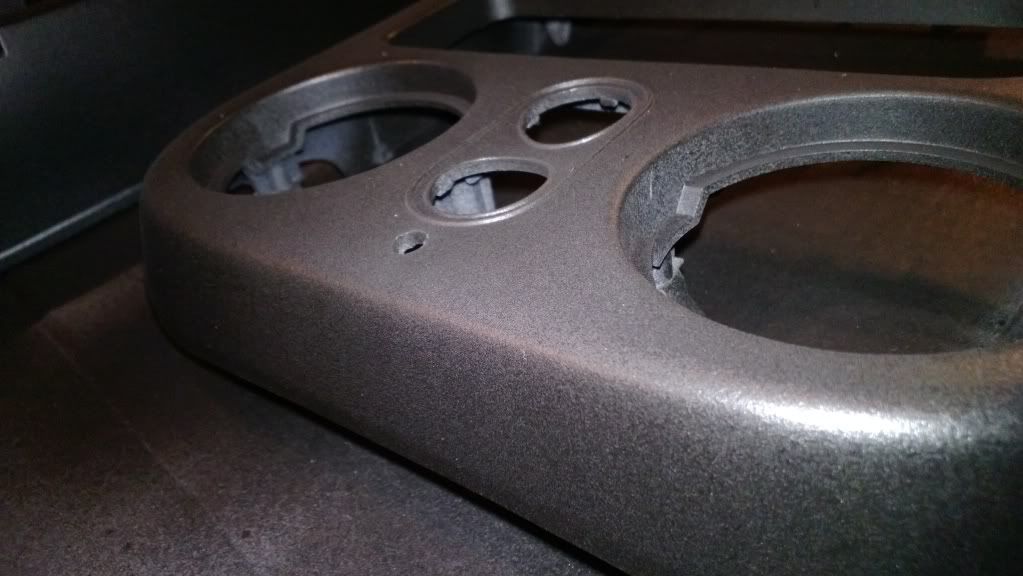
Hacked tombstone from constant radio removal...let's prep this with some sand on some paper
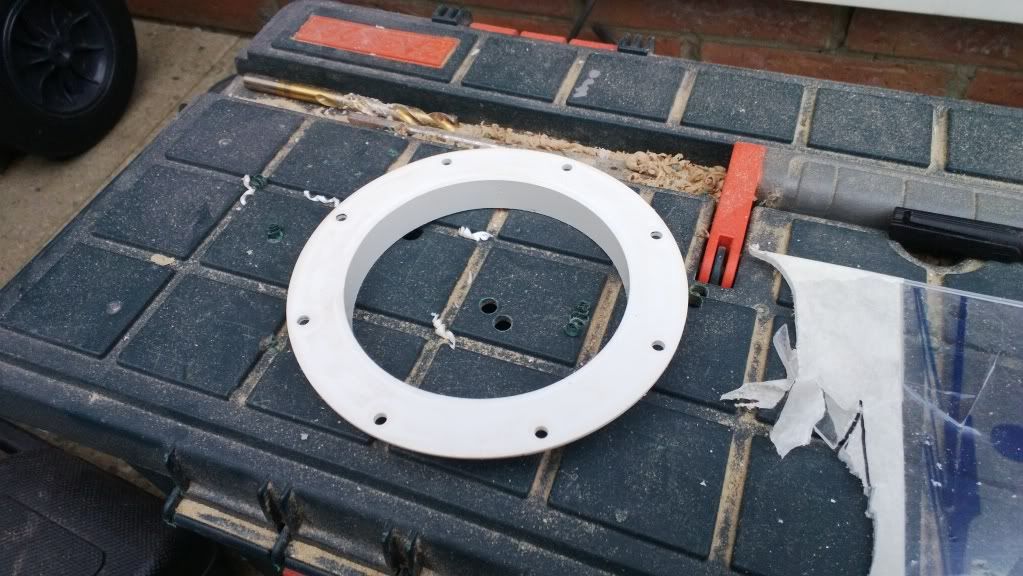
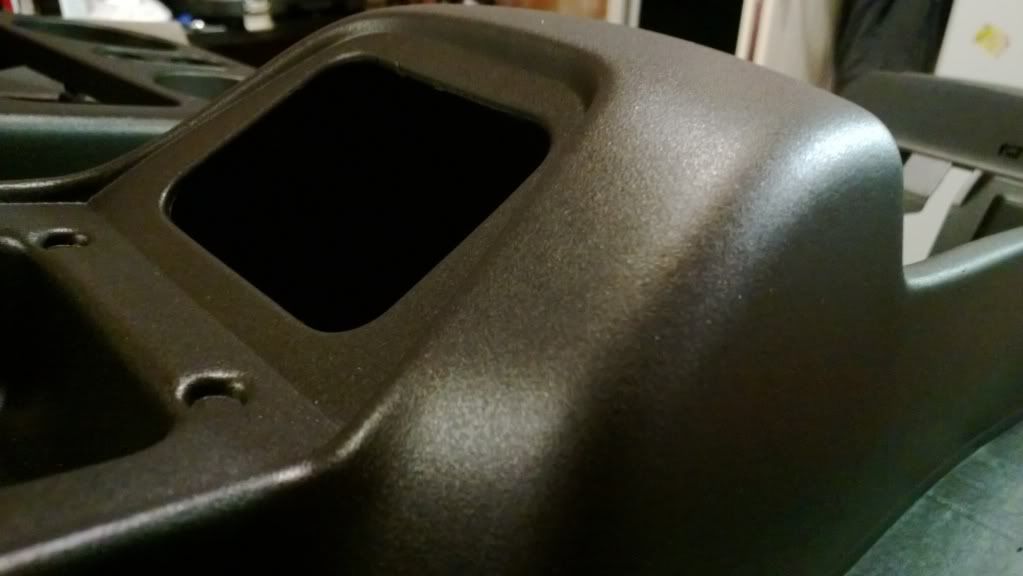
Let's prep the blanking plate (square thingy with hole), mask the console, and mark where the things will go:
Carefully cut using luck and find that it lines up perfectly... glue in place with a hammer
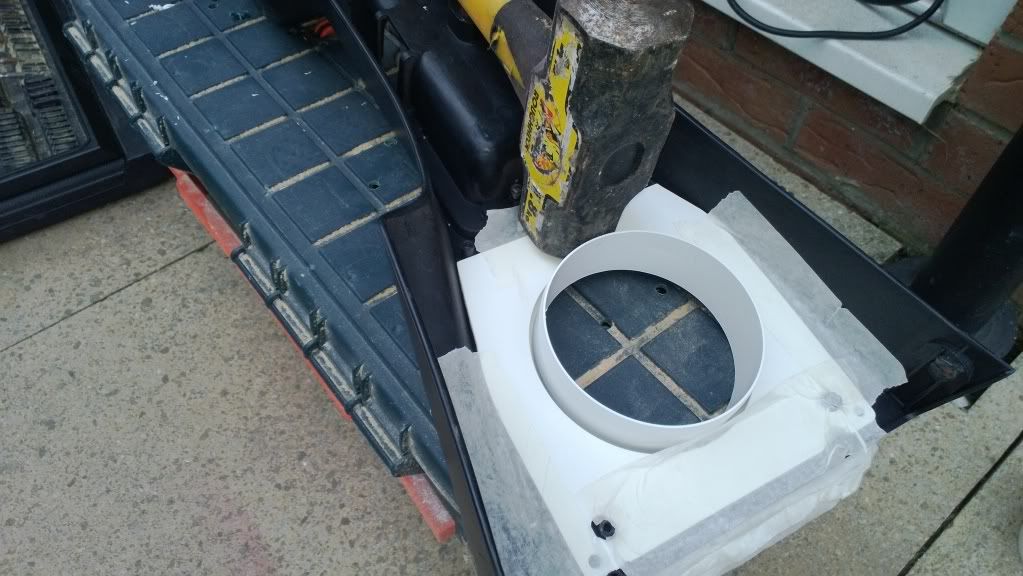
Done!
Get some old paper and with a dirty finger do the old primary school brass rubbing technique... on the square hole
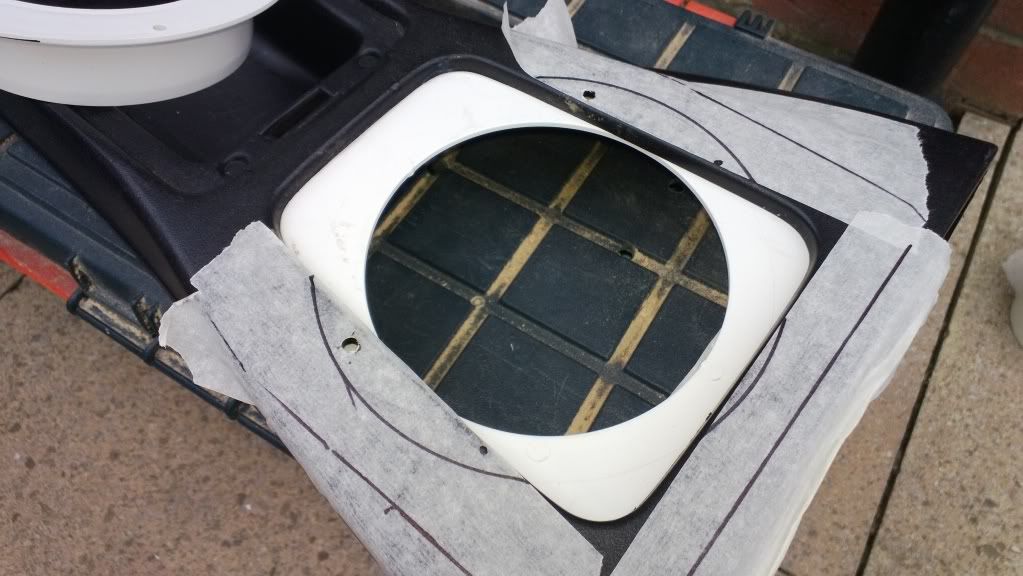
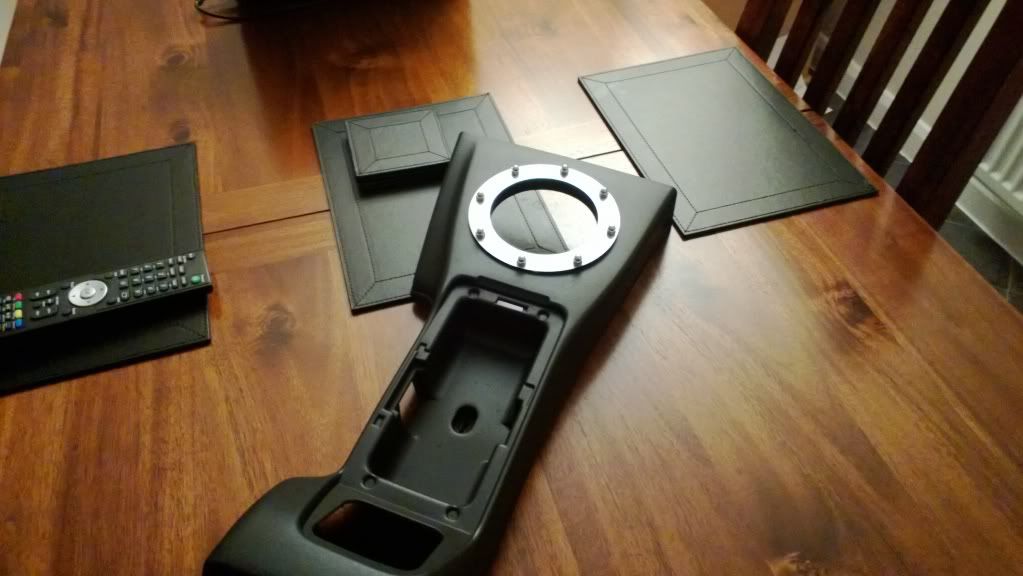
Cut out with scissors and fit in place:
Turn it over and draw..
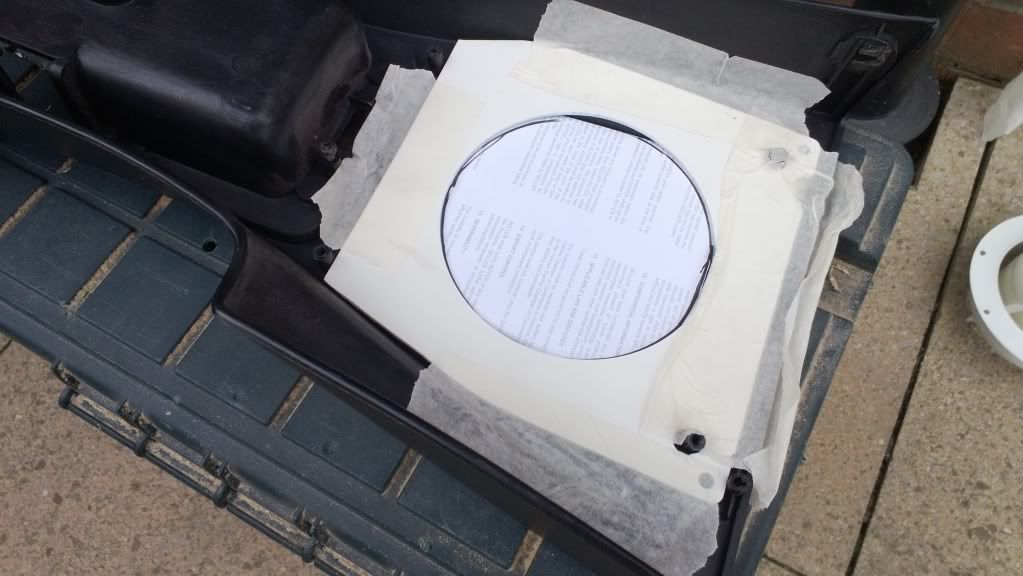
Result, we have drawn a circle
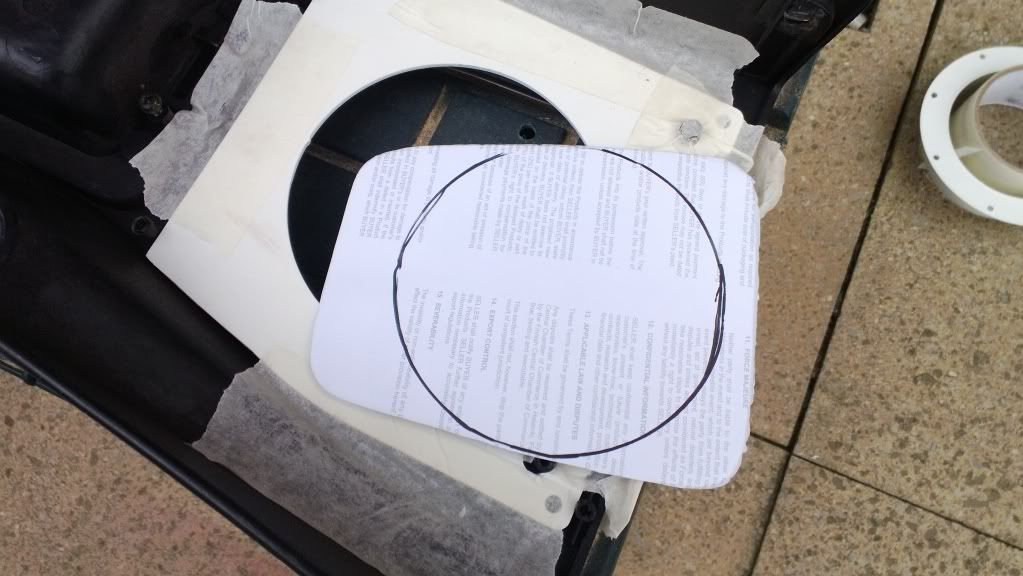
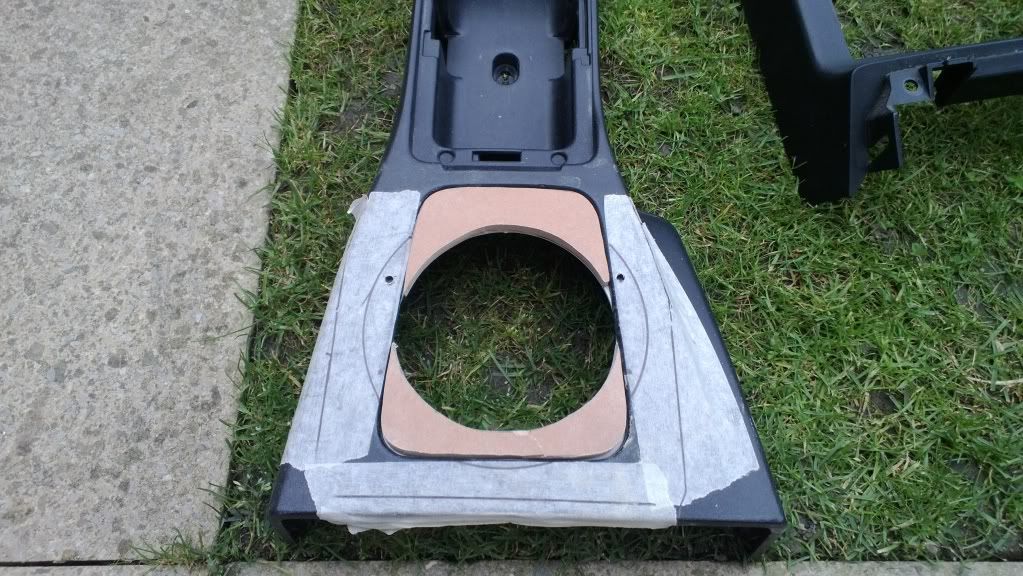
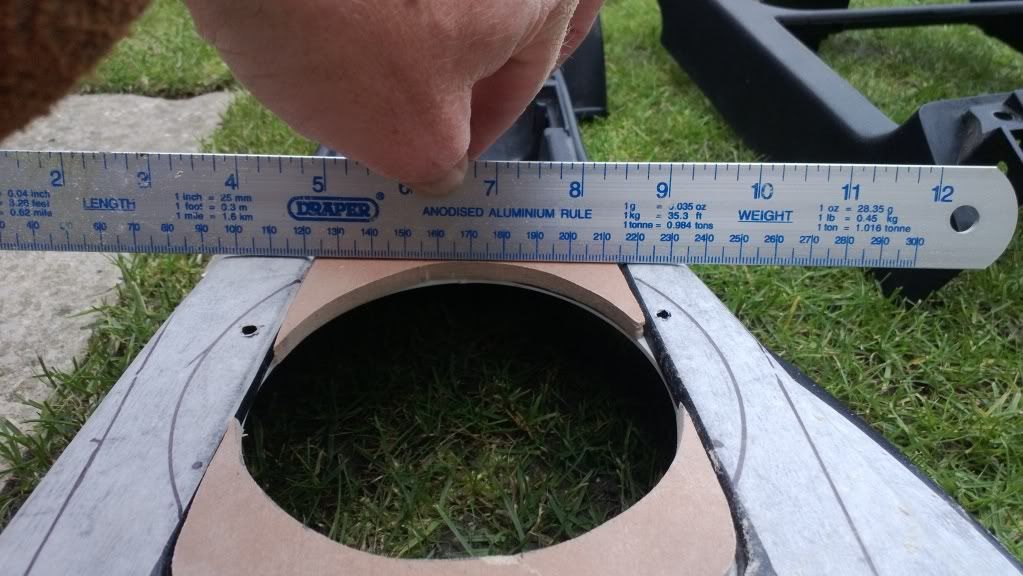
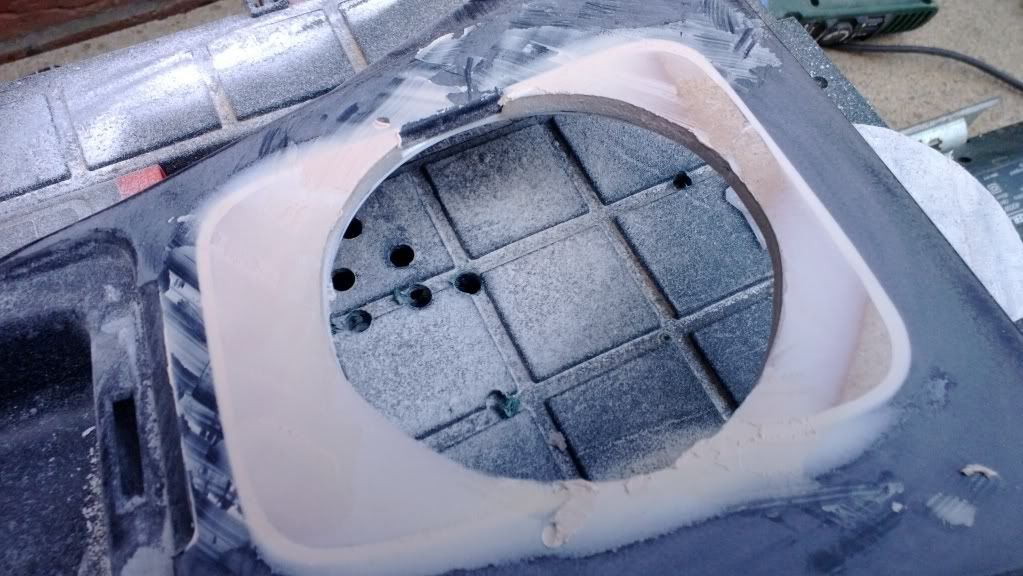
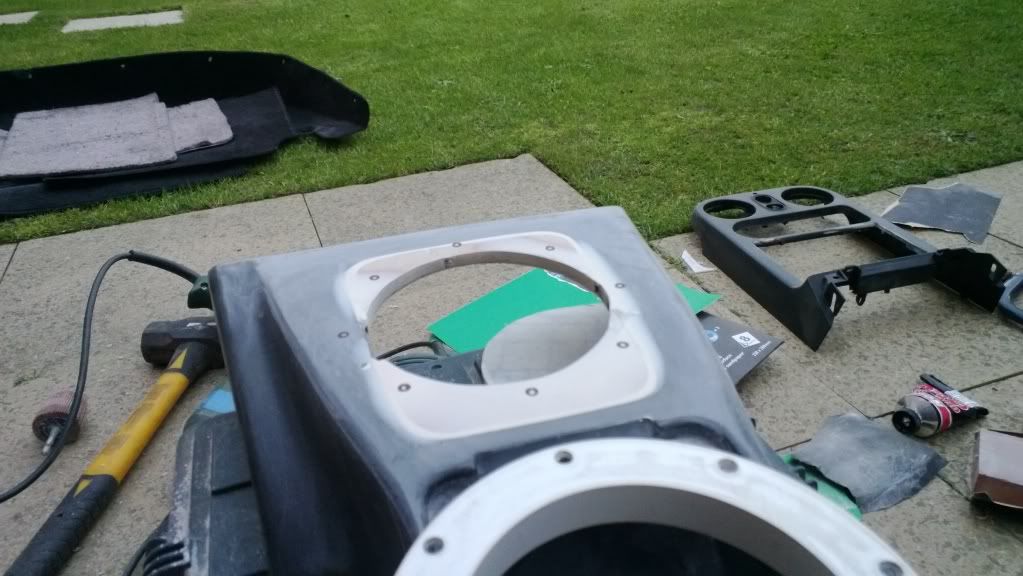
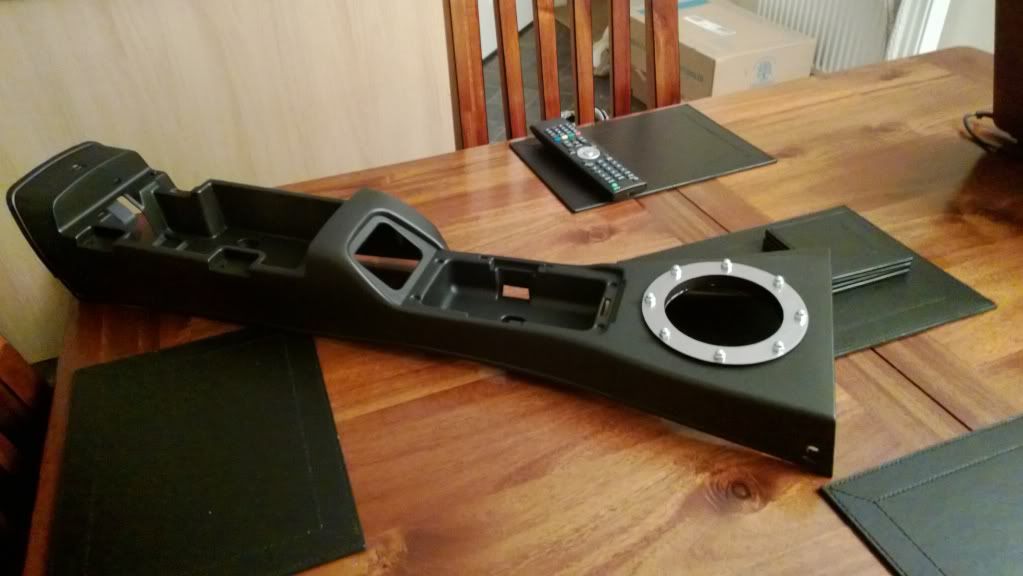
Cut out the hole and test fit again
Hmmm.... distance between the top and the plate is 6mm....
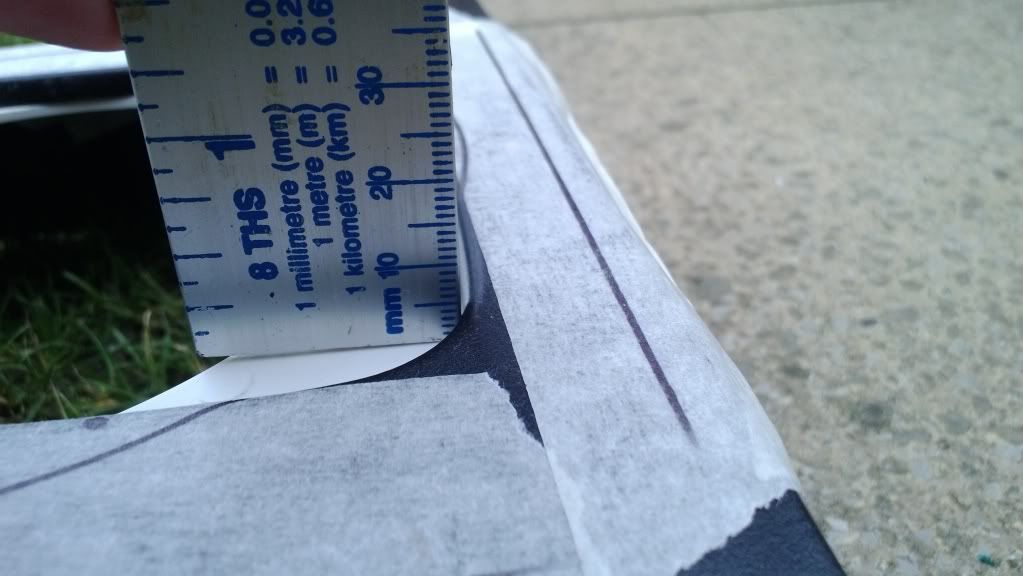
Think..... ah-ha, some thin laminate flooring cut-off will be perfect :)
Let's get jiggy wit it...
After you have cut off the ends of your fingers and dried the blood, you can test fit your flooring..
Waddya know... perfect....
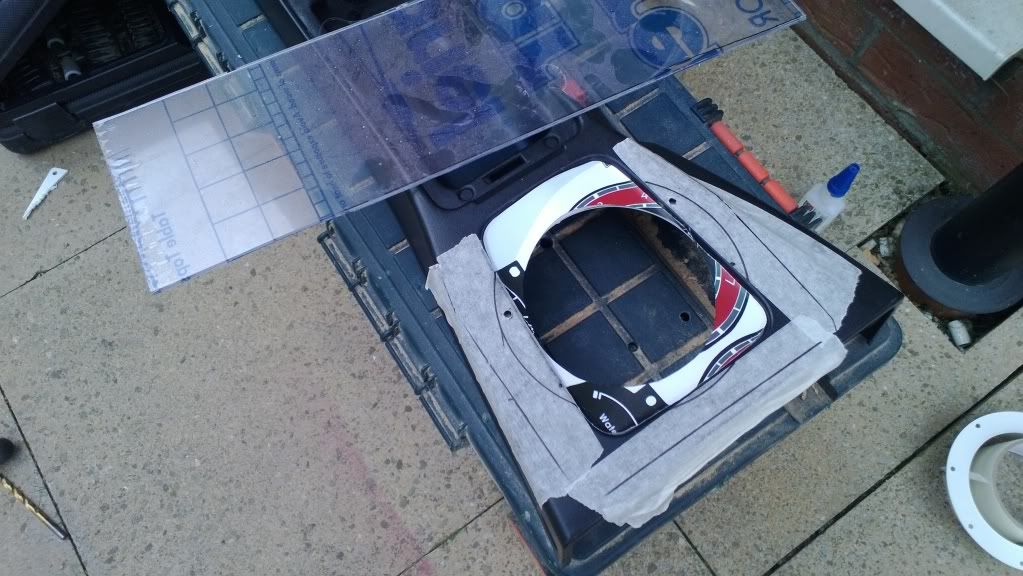
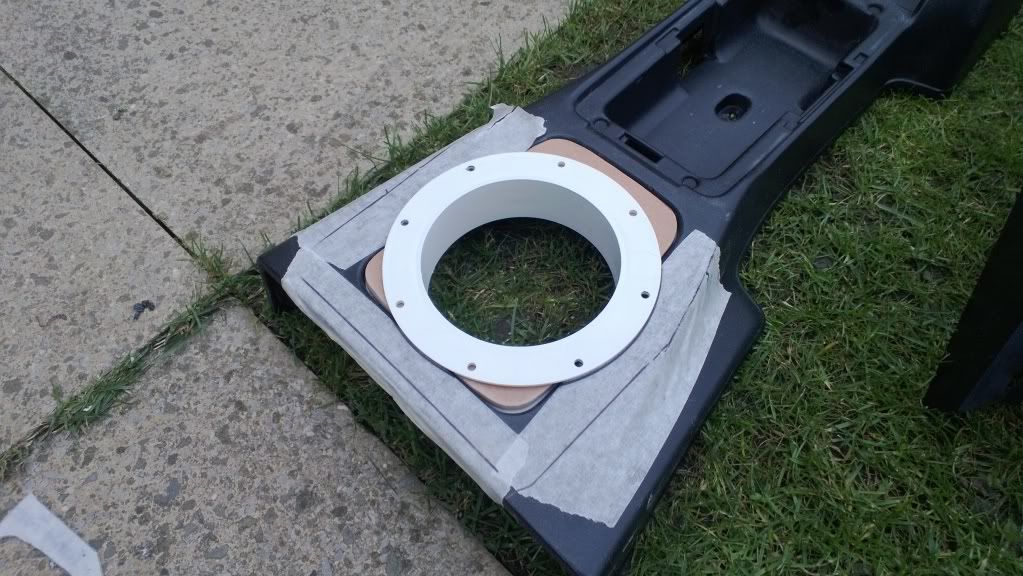
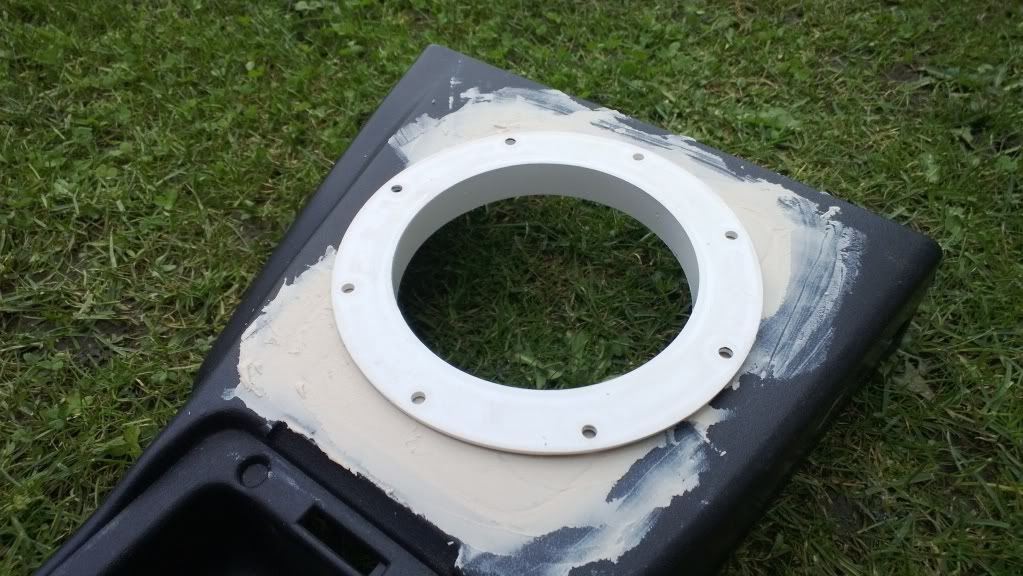
Test fit your hole and make sure your hole is where it should be..
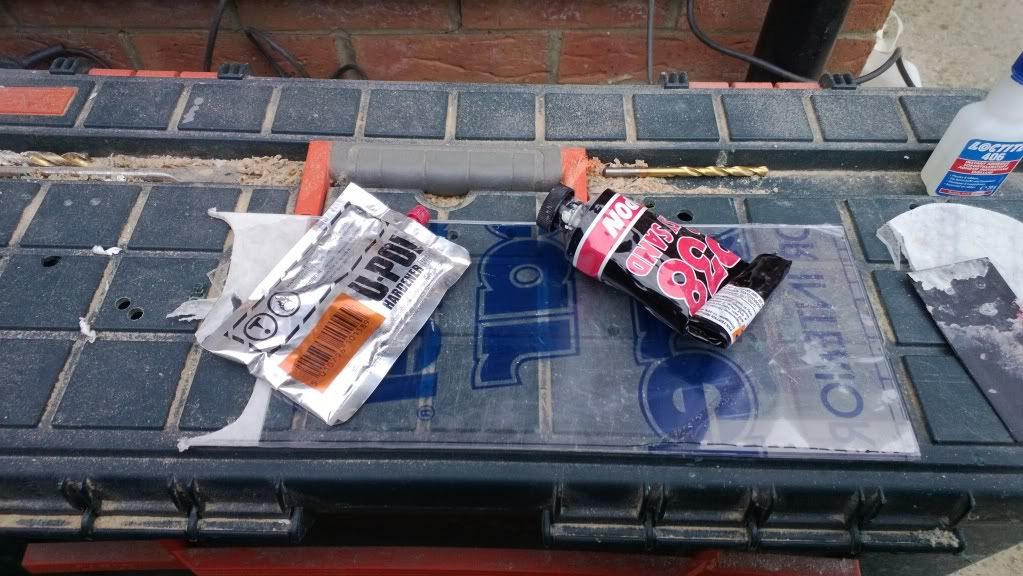
We're gonna need some lovely addictive smelling P38...time to flare the nostrils...
Fill your crack!
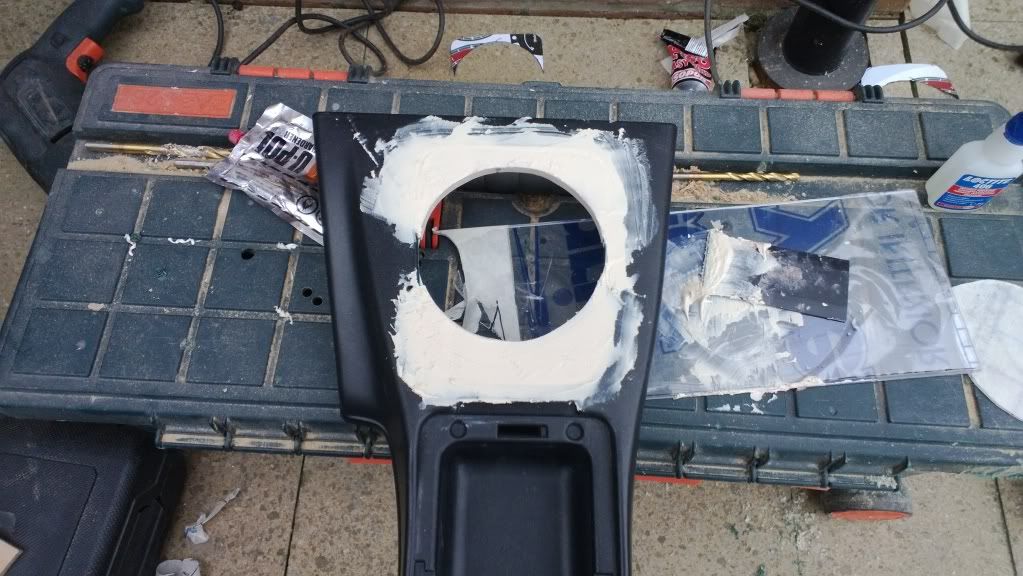
Whilst that ^ is drying, fill your other crack...
Whilst they ^ are both drying, trim your ring...
Test your hole..no reason, just test..
Sand....sand like the wind...
Fill your crack again... lot of crack filling going on here....
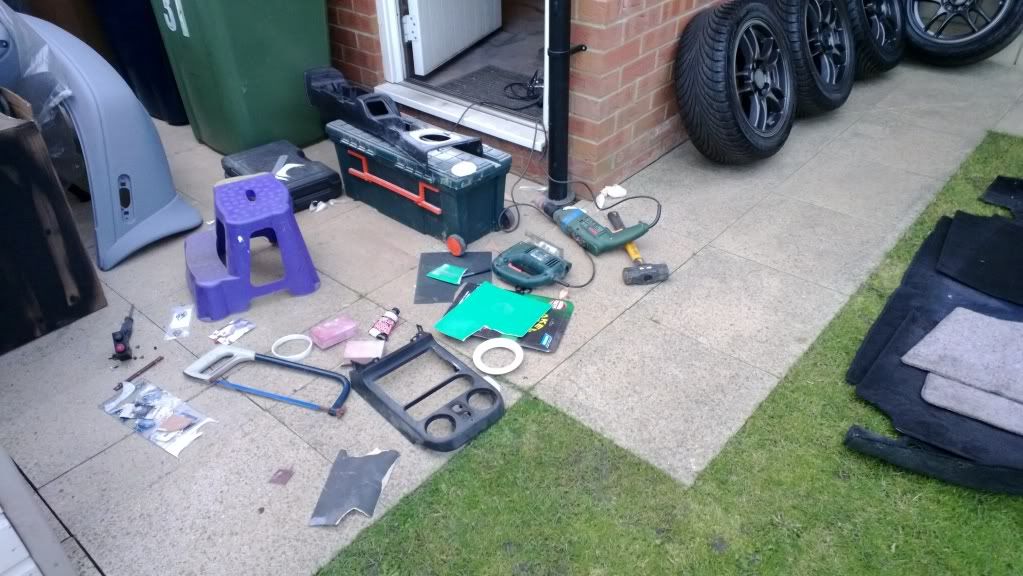
Be sure to keep your immaculate work area clear at all times...
Sand...sand like the wind...
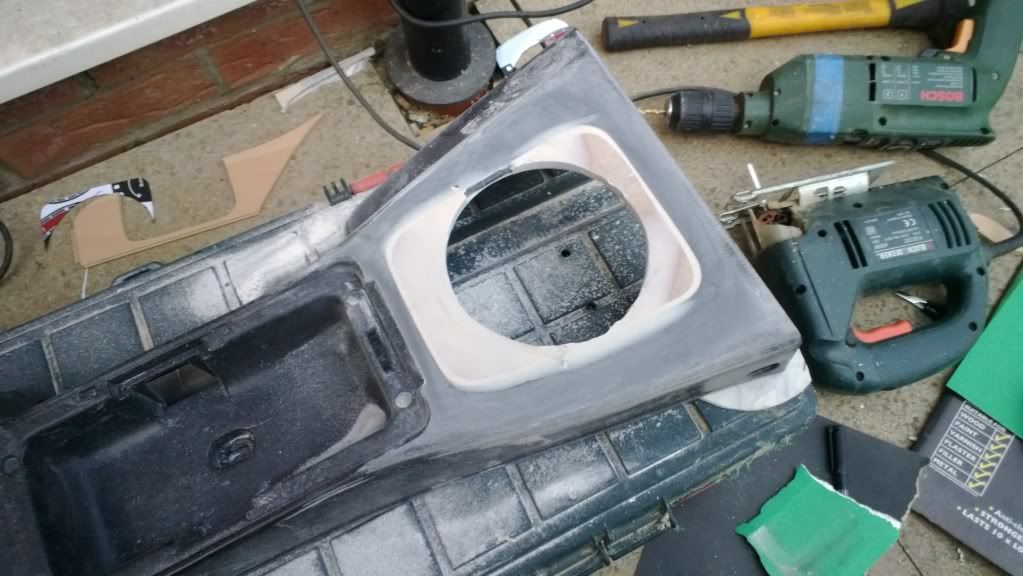
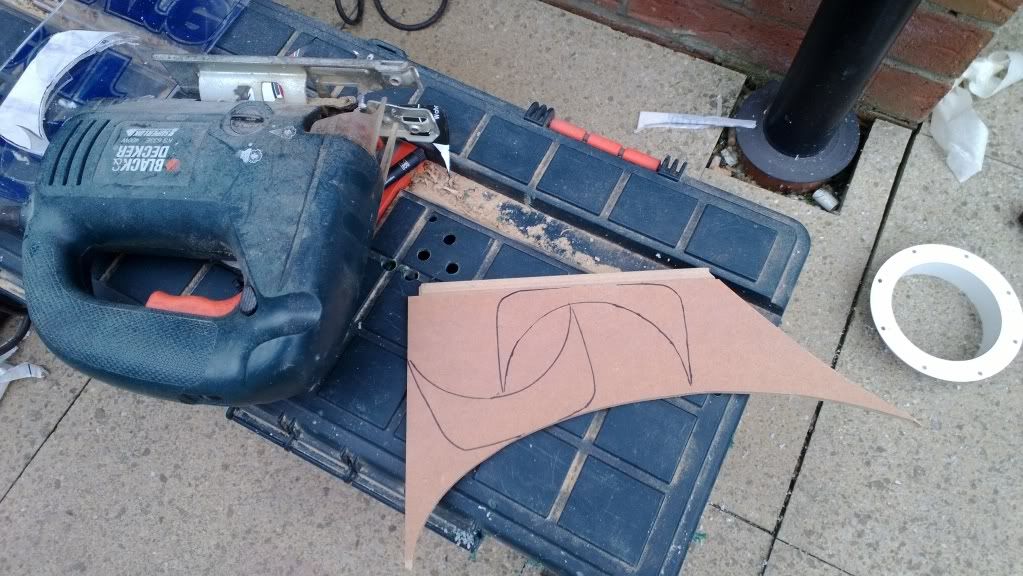
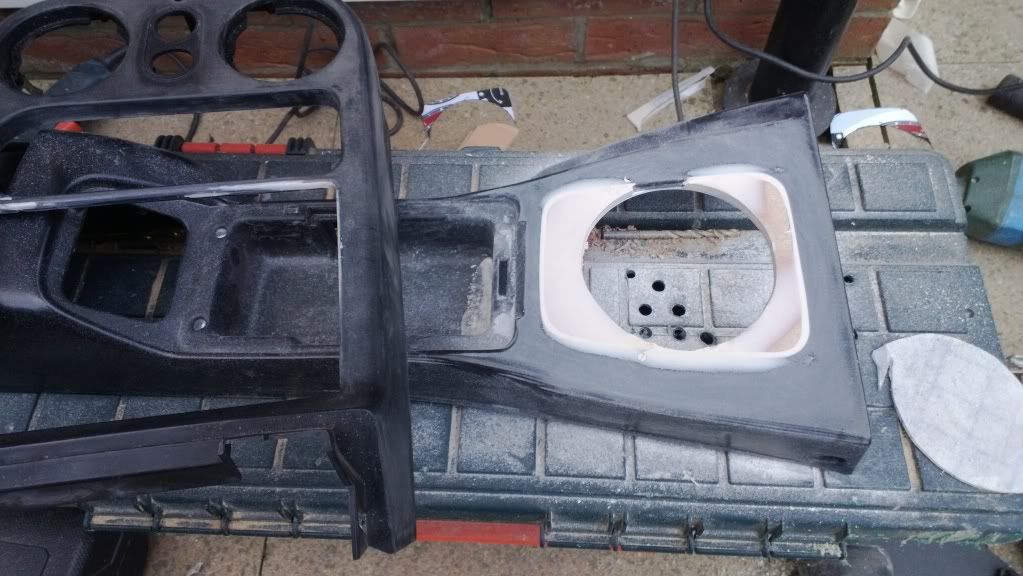
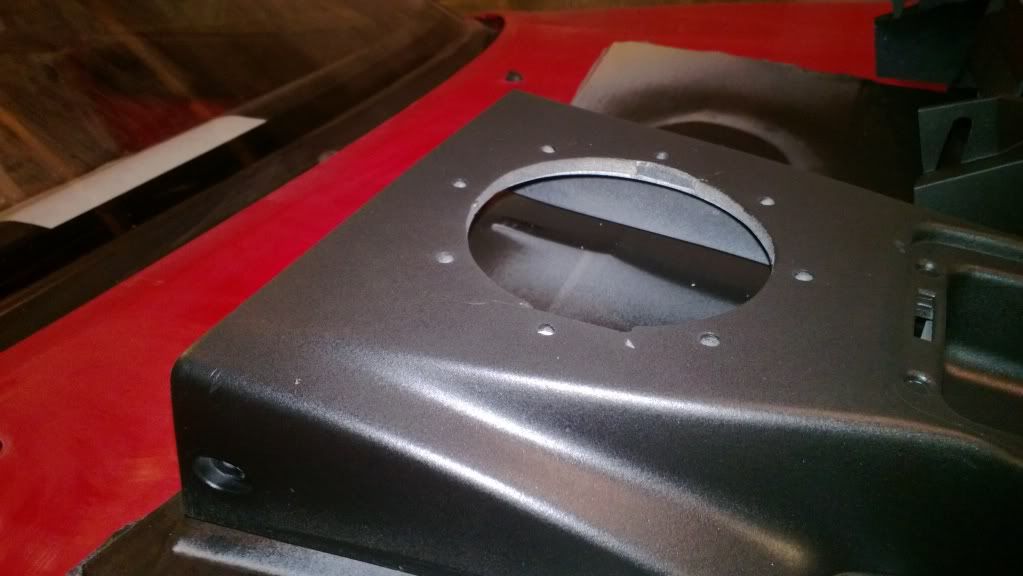
Test your hole again and draw some little circles... you are going to drill some new holes next to your big hole...
Holes drilled..
Now time to prep - not forgetting to sand smooth your little cracks... you can use a hammer to prep, but I would recommend meths.
Prep your other bit....
Go to the other end of your workshop and prepare for action. For this you will need clear base plastic primer...you must do this as this plastic is old... like really old, like ..anyway, spray your plastic primer all over - err, the plastic.
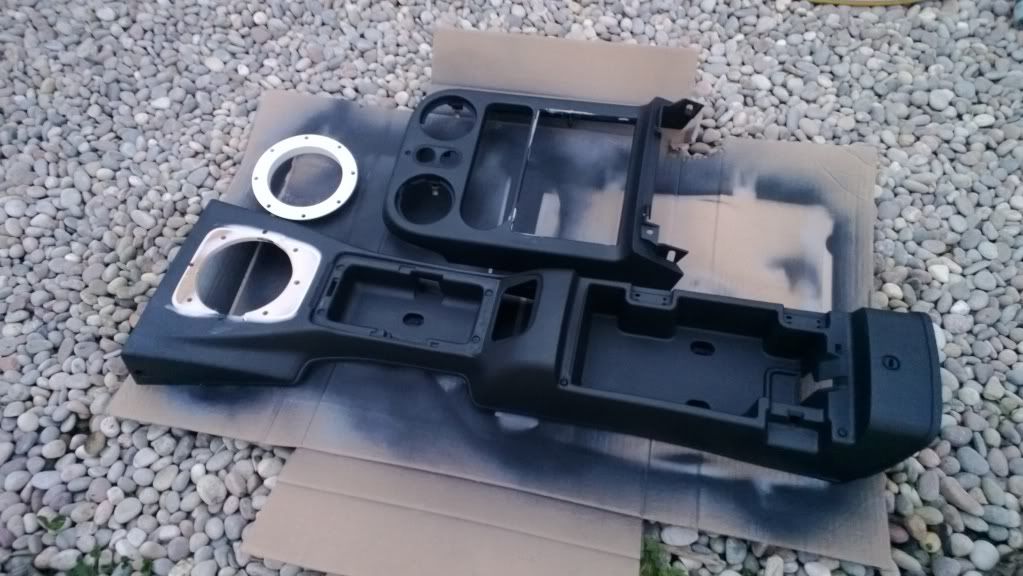
Allow to dry and realise the temperature is dropping, dampness will likely ensue, all the hard wotk will go to waste and you will ahve to start again...so move indoors, preferably a hamster cage.. and now prime, prime like you mean it, prime like it's.. err, just prime the things...
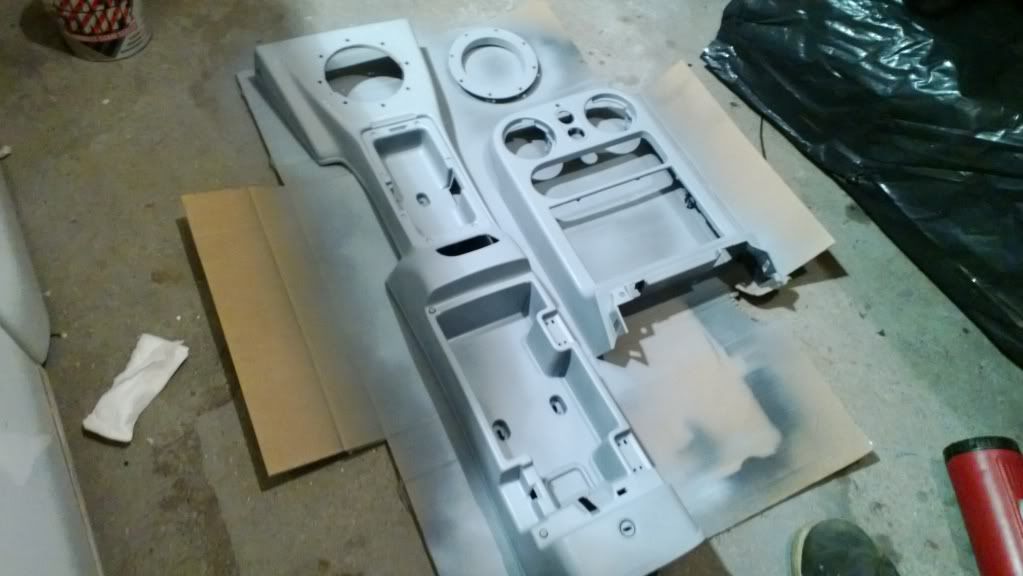
Now paint...paint like you mean it, paint like you never painted before.... now here's the technique. One light coat. WHilst that is still wet, apply another light coat. DO this from a distance of approx 12". This is important as you will see. Allow it to dry (touch dry) now give it another coat, this time heavier. Allow that to go tacky...now you need to.........................shoot from the hip. From approx hip height, spray a powder coat all over the things... this too is important as you will see.
Move to a safe area (bonnet of you five will do perfectly) it's no worry here cos this is yet to be resprayed..
Now whilst that ^ is drying, go on a mercy mission to the shops for the missus, call RS and tell him the text message you sent did not mean use drink to clean the engine bay, but Persil and Gunk...umm, long story...
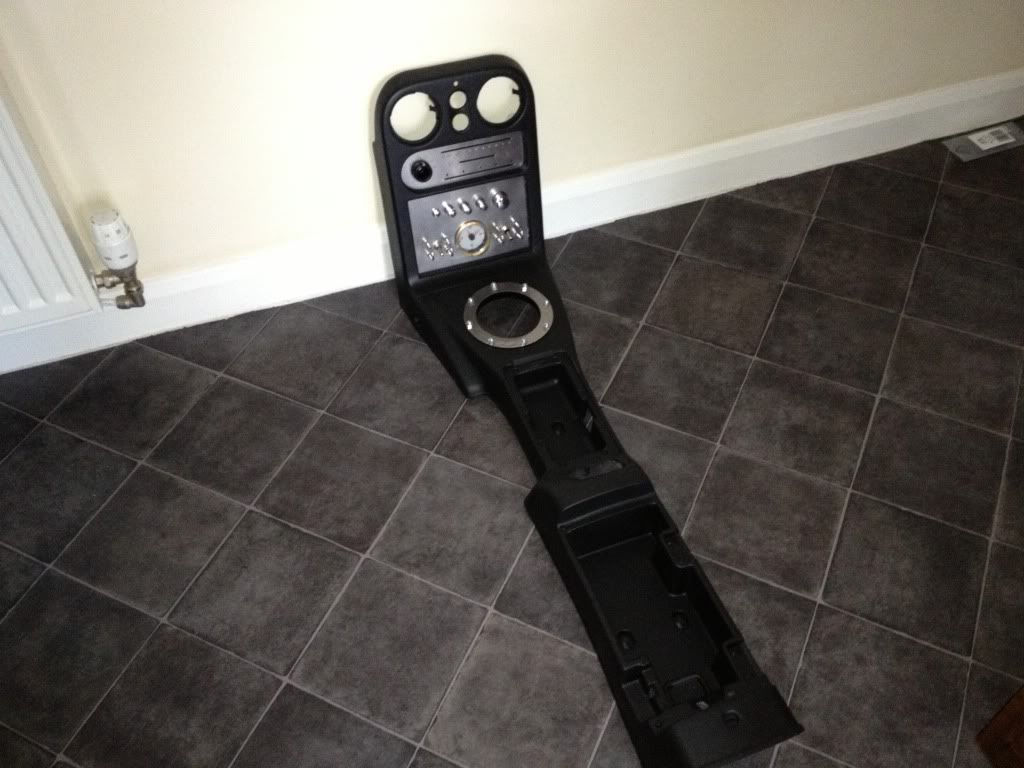
Right now we are back...let's have a coffee and check this out... ooooh, nice factory kind of finish...woop.
Now wait for the missue to go to bed, and move indoors to workshop number 3 - the kitchen. It's wise to move here as there is beer stored and food.
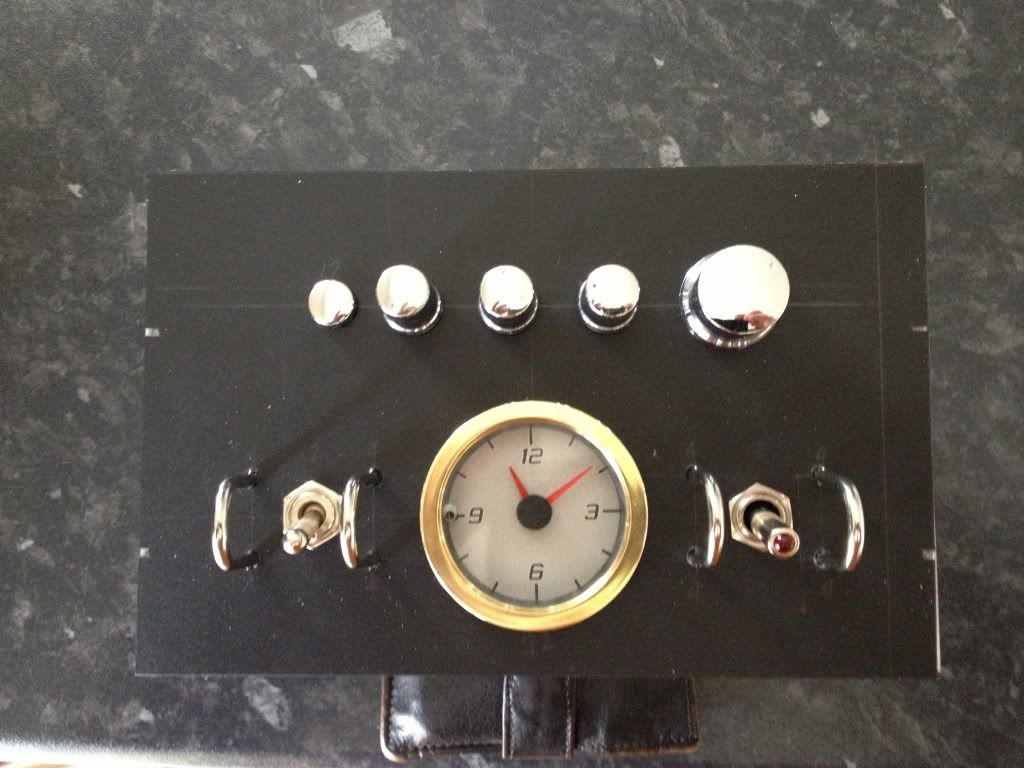
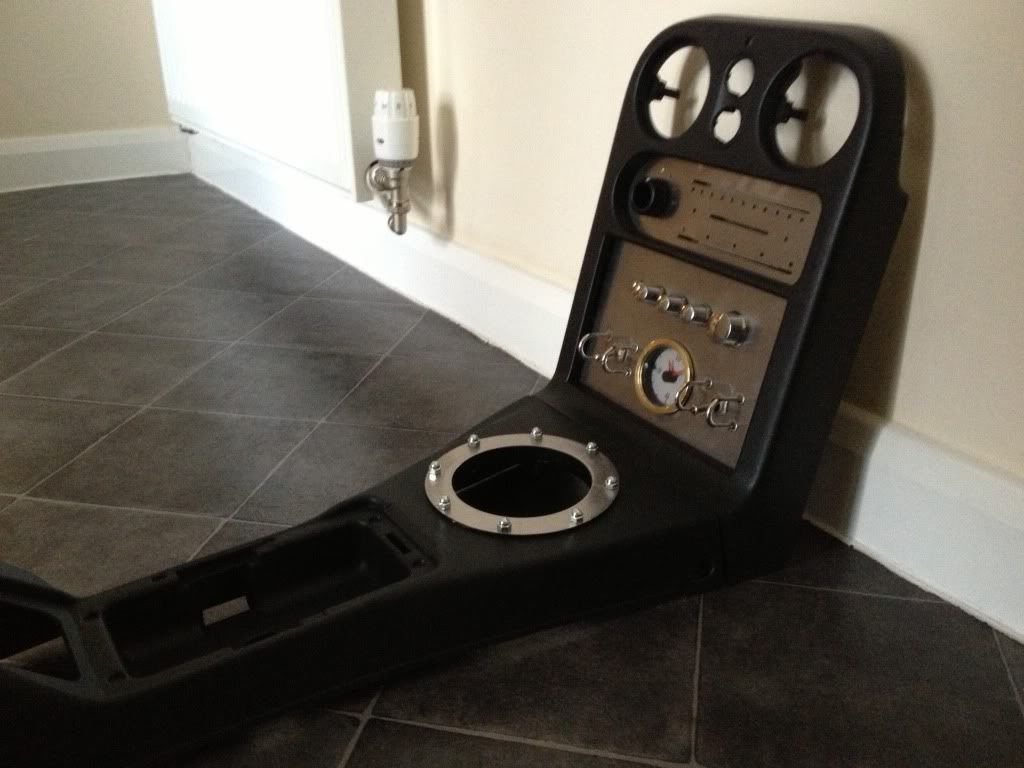
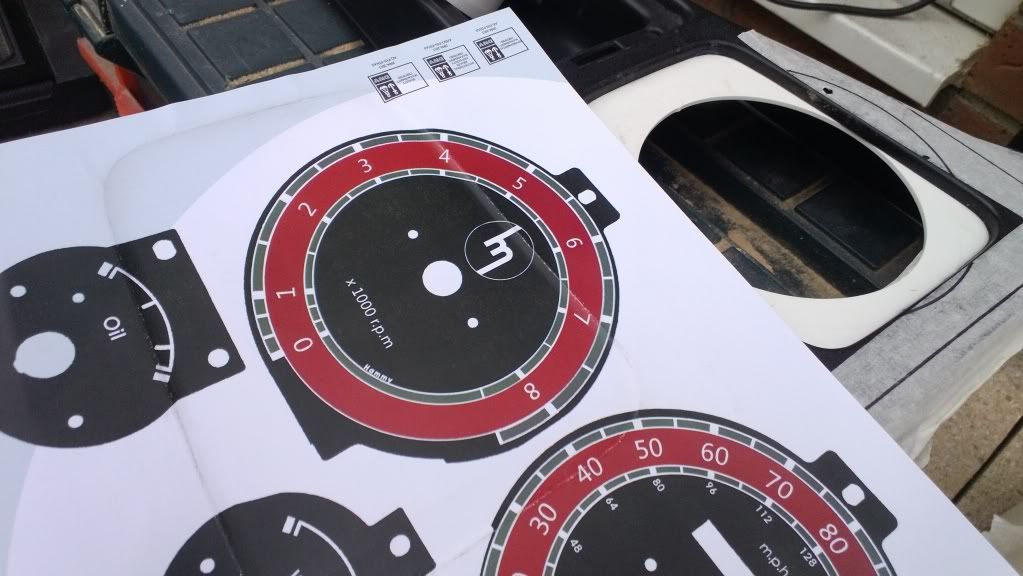
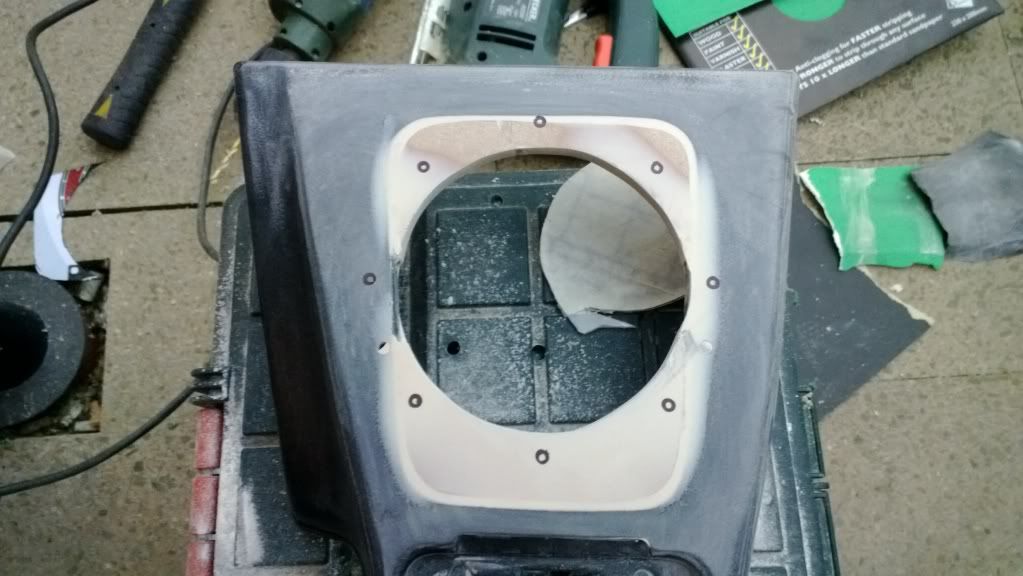
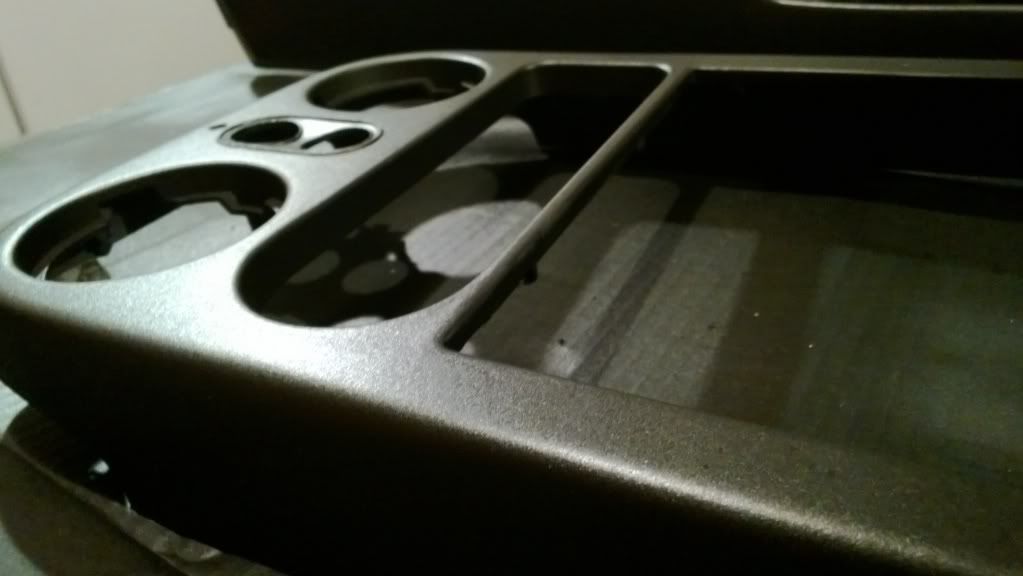
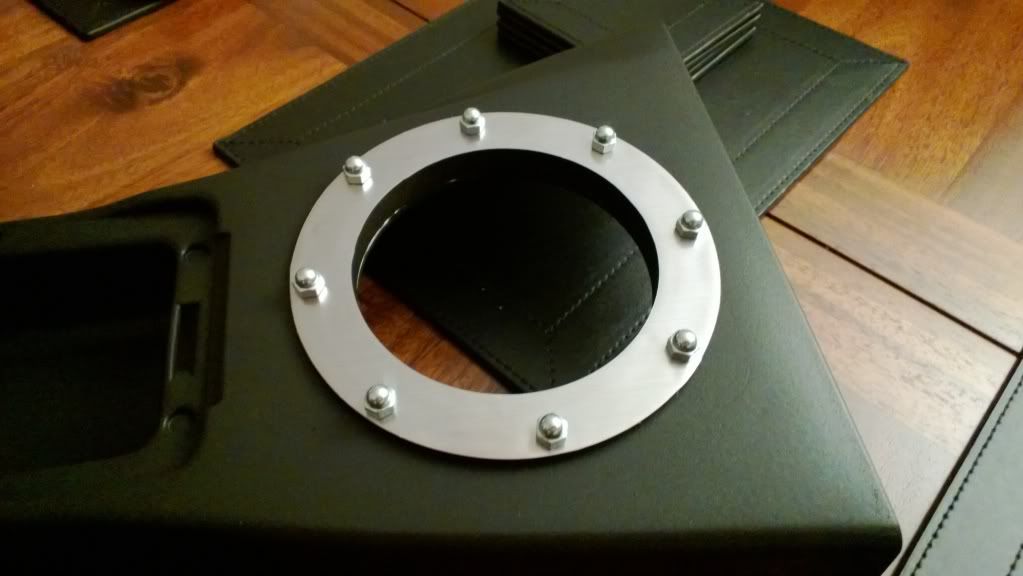
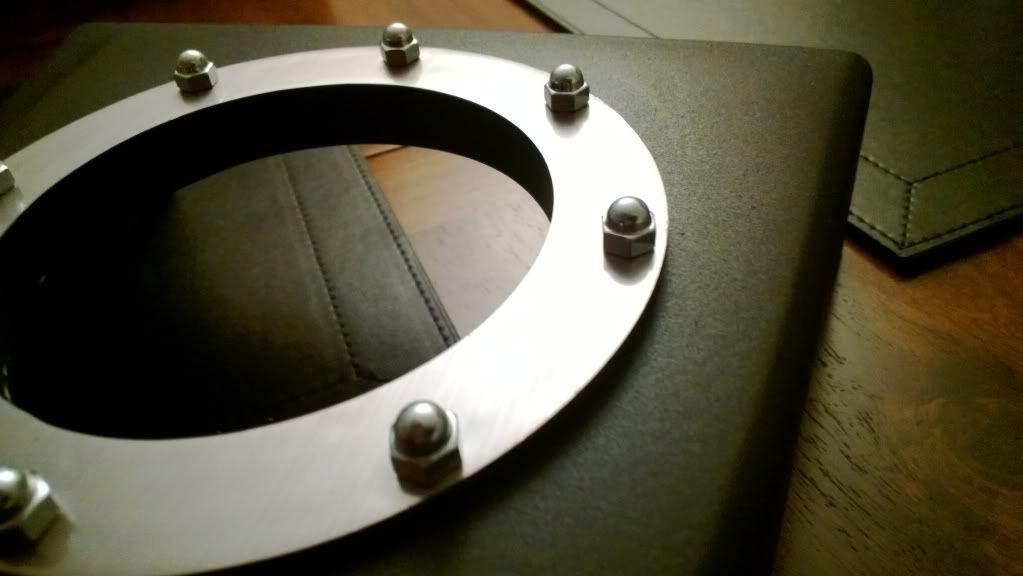
Now it is time to aluminiumise (made up word) your ring....to match your KGWorks cluster...
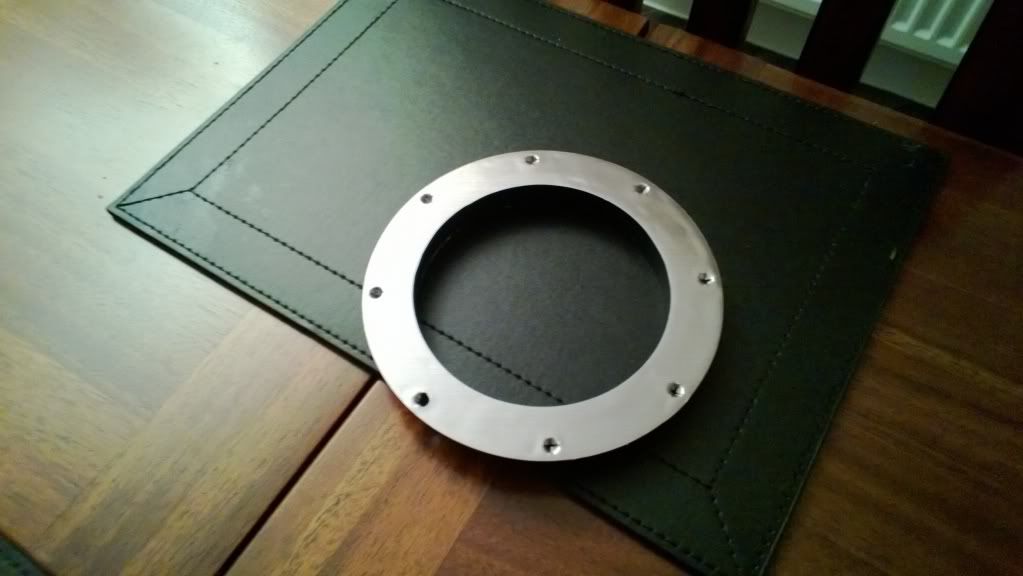
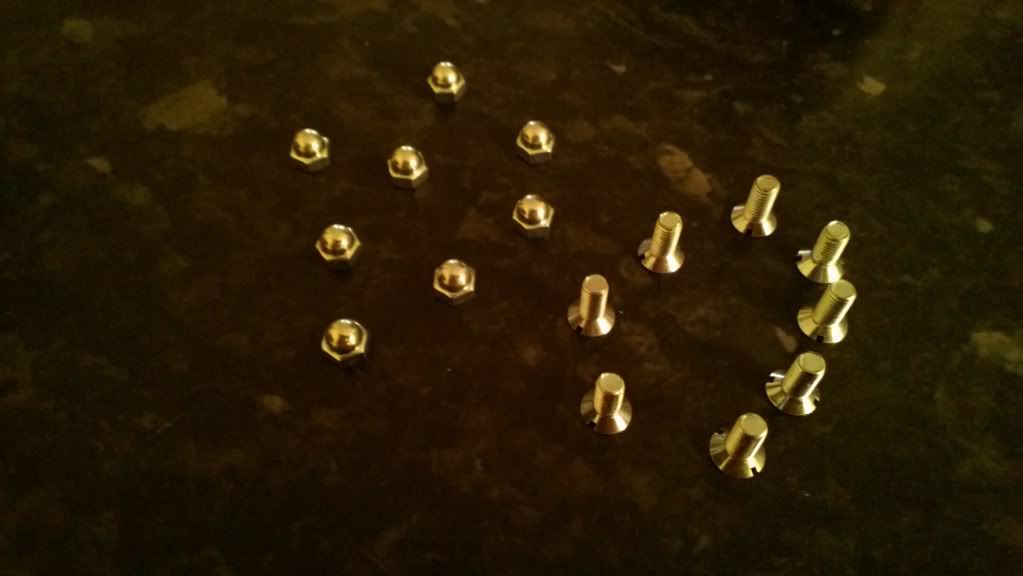
Now we are going to need our bolts...these match the same type used on the cluster...all very feng shway...
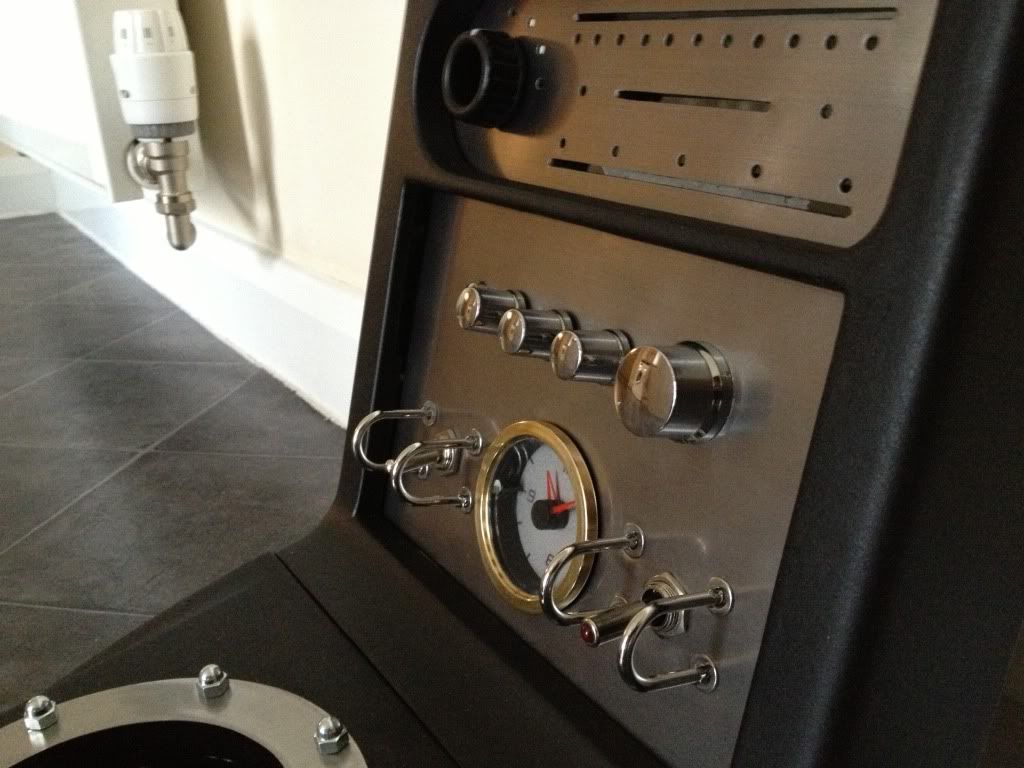
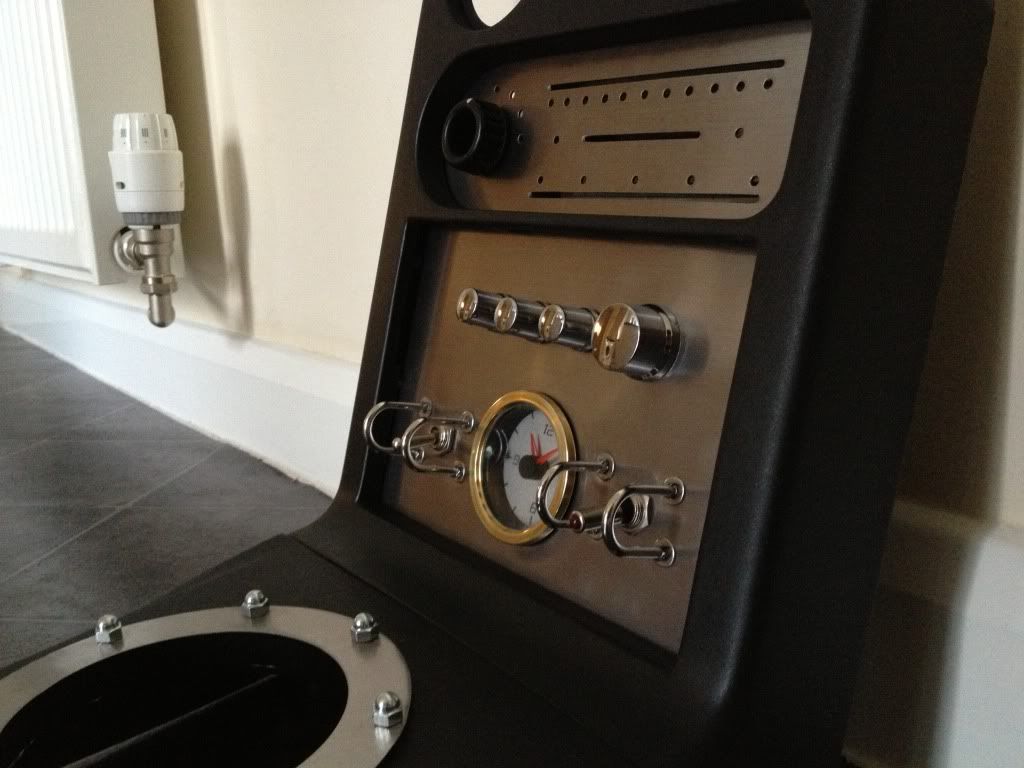
...and there we have it - a retro ring...a retro gear stick surround...with a nice textured, very hard finish. This will get a dusting coat of matt lacquer tomorrow, doesn't need it, but it adds a layer of extra protection.
Job done... :) I thankyou...and cost nothing :)
Now I will make a new round black leather gaiter... tomorrow perhaps :)
What you put in, you'll get back ten fold
***** THIS IS VERY IMPORTANT TO THE SITE AND HELPING YOU,OTHERWISE IT CLOSES AND ALL THIS ON LINE GARAGE IS GONE FOR GOOD*****
Greetings and welcome to menders, this site was built for every owner that might need her to help keep those bills low and also keep them on the road where they belong, she is run by very passionate enthusiasts owners for passionate enthusiastic owners, see her like a on line garage, there is a lot of tech stuff hopefully explained for everyone to use, if there is something you cannot get your head around, or you feel that there is a strong walk through guide missing that needs creating by one of us or from yourselves, please let us know, we are also on false book and youtube, which as short tech vids to help, and again if you feel there is a vid that would help please get it touch.
the menders is free, but like everything there is a cost to run things and bills( we are just happy its not a heating cost), so if we have saved you hundreds, please throw a small donation in the pot so we can keep on going to carry on helping others in the same way .
*** we are currently looking for a sponsor for this year, so if you have the passion and can see this sites worth to everyone , please get in touch and step forward to help***
And thank heavens that we are now on the way back up the brighter ,warmer longer days, "come on summer", and lets see those project builds.
M-m
Round peg - square hole
Regards, Hammy.
1990 Eunos 1.6 Classic Red, soon to be a different colour
Re: Round peg - square hole
That man has skillz me thinks!
DAVE
1992 1.6 BRG V-Spec - 2003 MK2.5 Sport - 1992 ROADSTER 1.6.
- Mazda Mender
- Site Admin
- Posts: 15090
- Joined: Tue Dec 06, 2011 6:18 pm
- Location: Pie land, in the glen of Wiganshire
- Contact:
Re: Round peg - square hole
I hate being off ill, as you end up climbimg walls, when your active, it is hard to switch off, i feel your pain
Nice work Hammy
M-m
Nice work Hammy
M-m
The Disclaimer:-
This post is a natural product made from recycled electrons. The slight variations in spelling and grammar enhance its individual character and beauty and in no way are to be considered flaws or defects, the articles/answers/comments are provided for information purposes and they are not intended to substitute informed professional advice, I or mazdamenders.net cannot personally be hold responsible for any damage occurred from following this procedure or any injuries from it. Proceed at your own risk.
Mk 1 Eunos 93 black V.S II 1.8 ,
Mk 2 .1/4 Roadster 99 black & gold V.S 1.8 .
Mk 1 Eunos 90 1.6 soul red ..f/ build
MK 2.1/4 Blue V.S Roadster 1.8 99 ..
MK1 1.8 ,white import.. (Ashleighs)
MK1 1.6 yellow J ltd import.f/build
MK 1 1.8 black Tokyo Ltd..f/build
http://www.mx5oc.co.uk/ http://www.mx5nutz.com/forum/ http://miata.net/ http://www.autolinkuk.co.uk/
Re: Round peg - square hole
Wow!
MX-5 1.8 S-VT Sport 1.8 2002/02 Finished in Starlight Silver with matching hardtop
I'm learning.........Slowly!
Re: Round peg - square hole
I am impressed! Did you use special paint for the plastic/vinyl, or is it regular car spray paint?
Barn1e
MY51 Mk2.5 1.8 Sport in Crystal Blue
Re: Round peg - square hole
Plastic primer was the base - this is a must, without it, normal paint or even plastic paint will chip off easily. The plastic primer means you can use just about any paint you want.
I followed the primer with matt black plasticoat.
Here is the panel finished... it will illuminate from the back... will make some coloured transparency.
Started also making my new radio panel... this will house a retro style radio - well an amp - all you will see are some buttons. There will also be a retro analogue clock and two toggle switches.
Need to finish making the new light and hazard panel - this will also house two toggle switches.
and with the console...
Regards, Hammy.
1990 Eunos 1.6 Classic Red, soon to be a different colour
Re: Round peg - square hole
All I can say is ... wow! Very creative and very nice result.
Niall
1997 1.8i Roadster in Black
- Induction kit, Stainless Exhaust System, Lowered Springs
1998 1.8i S MX-5 in Silver
- Under restoration
Also into taking a few pictures - check out my website.
1997 1.8i Roadster in Black
- Induction kit, Stainless Exhaust System, Lowered Springs
1998 1.8i S MX-5 in Silver
- Under restoration
Also into taking a few pictures - check out my website.
Re: Round peg - square hole
Brilliant. Fantastic attention to detail.
Very talented.
Very talented.
MEV Exocet.
1995 1.8 Mk1 White Roadster. S Special Type I.
Exocet build thread - http://www.mazdamenders.net/forum/viewtopic.php?f=35&t=1138
http://www.jansholistics.co.uk/
1995 1.8 Mk1 White Roadster. S Special Type I.
Exocet build thread - http://www.mazdamenders.net/forum/viewtopic.php?f=35&t=1138
http://www.jansholistics.co.uk/
Re: Round peg - square hole
Here is my new radio panel part way through fabrication :)
Some things to do to it yet, including an aluminium finish...
Regards, Hammy.
1990 Eunos 1.6 Classic Red, soon to be a different colour
Re: Round peg - square hole
Eunos 1.6 special 1989 with a few added extras
Eunos 1991 1.6
Eunos 1990 1.6 project
Mk2 1999 1.8
Eunos 1991 1.6
Eunos 1990 1.6 project
Mk2 1999 1.8
Re: Round peg - square hole
Done.....
Going to keep the brass surround on the clock as it compliments the cluster ;)
Regards, Hammy.
1990 Eunos 1.6 Classic Red, soon to be a different colour
Re: Round peg - square hole
The stereo knobs will be changed tho... for knurled telecaster knobs... (that's a guitar btw)
Regards, Hammy.
1990 Eunos 1.6 Classic Red, soon to be a different colour
Re: Round peg - square hole
What like this type H ?
sorry about the fuzzy picture
Eunos 1.6 special 1989 with a few added extras
Eunos 1991 1.6
Eunos 1990 1.6 project
Mk2 1999 1.8
Eunos 1991 1.6
Eunos 1990 1.6 project
Mk2 1999 1.8
Re: Round peg - square hole
flea wrote:What like this type H ?
sorry about the fuzzy picture
Yep, exactly like them mate :)
Regards, Hammy.
1990 Eunos 1.6 Classic Red, soon to be a different colour
Who is online
Users browsing this forum: No registered users and 1 guest