What you put in, you'll get back ten fold
***** THIS IS VERY IMPORTANT TO THE SITE AND HELPING YOU,OTHERWISE IT CLOSES AND ALL THIS ON LINE GARAGE IS GONE FOR GOOD*****

Greetings and welcome to menders, this site was built for every owner that might need her to help keep those bills low and also keep them on the road where they belong, she is run by very passionate enthusiasts owners for passionate enthusiastic owners, see her like a on line garage, there is a lot of tech stuff hopefully explained for everyone to use, if there is something you cannot get your head around, or you feel that there is a strong walk through guide missing that needs creating by one of us or from yourselves, please let us know, we are also on false book and youtube, which as short tech vids to help, and again if you feel there is a vid that would help please get it touch.
the menders is free, but like everything there is a cost to run things and bills( we are just happy its not a heating cost), so if we have saved you hundreds, please throw a small donation in the pot so we can keep on going to carry on helping others in the same way .

*** we are currently looking for a sponsor for this year, so if you have the passion and can see this sites worth to everyone , please get in touch and step forward to help***

And thank heavens that we are now on the way back up the brighter ,warmer longer days, "come on summer", and lets see those project builds.


M-m

waterpump/cambelt etc replacement howto?

User avatar
Mazda Mender
Site Admin
Posts: 15090
Joined: Tue Dec 06, 2011 6:18 pm
Location: Pie land, in the glen of Wiganshire
Contact:

Re: waterpump/cambelt etc replacement howto?

Postby Mazda Mender » Sun Mar 20, 2016 10:33 pm

sandmonster wrote:All done... got more pics to come, but here's the new housing fitted taken just before the covers etc. went back on
Thermostat.jpg
.

Now, where's that Radox...?
:text-givemebeer:

:text-goodpost: :text-coolphotos: :bow-yellow: :clap: :clap: :clap: :clap: :clap: :clap: :handgestures-thumbup:
M-m
The Disclaimer:-
This post is a natural product made from recycled electrons. The slight variations in spelling and grammar enhance its individual character and beauty and in no way are to be considered flaws or defects, the articles/answers/comments are provided for information purposes and they are not intended to substitute informed professional advice, I or mazdamenders.net cannot personally be hold responsible for any damage occurred from following this procedure or any injuries from it. Proceed at your own risk.


Mk 1 Eunos 93 black V.S II 1.8 ,
Mk 2 .1/4 Roadster 99 black & gold V.S 1.8 .
Mk 1 Eunos 90 1.6 soul red ..f/ build
MK 2.1/4 Blue V.S Roadster 1.8 99 ..
MK1 1.8 ,white import.. (Ashleighs)
MK1 1.6 yellow J ltd import.f/build
MK 1 1.8 black Tokyo Ltd..f/build


http://www.mx5oc.co.uk/ http://www.mx5nutz.com/forum/ http://miata.net/ http://www.autolinkuk.co.uk/
User avatar
sandmonster
Regular
Posts: 68
Joined: Mon Oct 19, 2015 4:26 pm
Location: Sunny Salford

Re: waterpump/cambelt etc replacement howto?

Postby sandmonster » Tue Mar 22, 2016 8:27 pm

This is the little bu88er that caused it all:
[youtube]YLF5fHLW9rA[/youtube]
https://youtu.be/YLF5fHLW9rA


How it went...

Belts off (there's a howto on here somewhere so no need to go into detail on that) but put it in gear and crack the waterpump and crank pulley bolts before taking the belts off.
IMG_2947.jpg
IMG_2947.jpg (1.34 MiB) Viewed 3470 times


Getting the coil pack off is a bit tricky until you get the knack of getting in there with an open ended spanner at a bit of an angle (had some practice on that - see later)
IMG_2948.jpg
IMG_2948.jpg (1.29 MiB) Viewed 3470 times


Rocker cover off (don't laugh at the bits of paper towel stuffed in the spark plug holes - had a nightmare on a former car once when something accidentally dropped in! better safe than sorry)
IMG_2951.jpg
IMG_2951.jpg (1.67 MiB) Viewed 3470 times


Timing marks all lined up and cams locked - not sure if this is really necessary!
IMG_2957.jpg
IMG_2957.jpg (1.23 MiB) Viewed 3470 times
IMG_2953.jpg
IMG_2953.jpg (1.89 MiB) Viewed 3470 times


Especially as the crank locking tool from autolink doesn't lock in the TDC position??? Worried about that and fannied about checking and rechecking TDC a few times before taking the wrenches off the cams and fitting the locking tool to undo the crank bolt...
IMG_2959.jpg
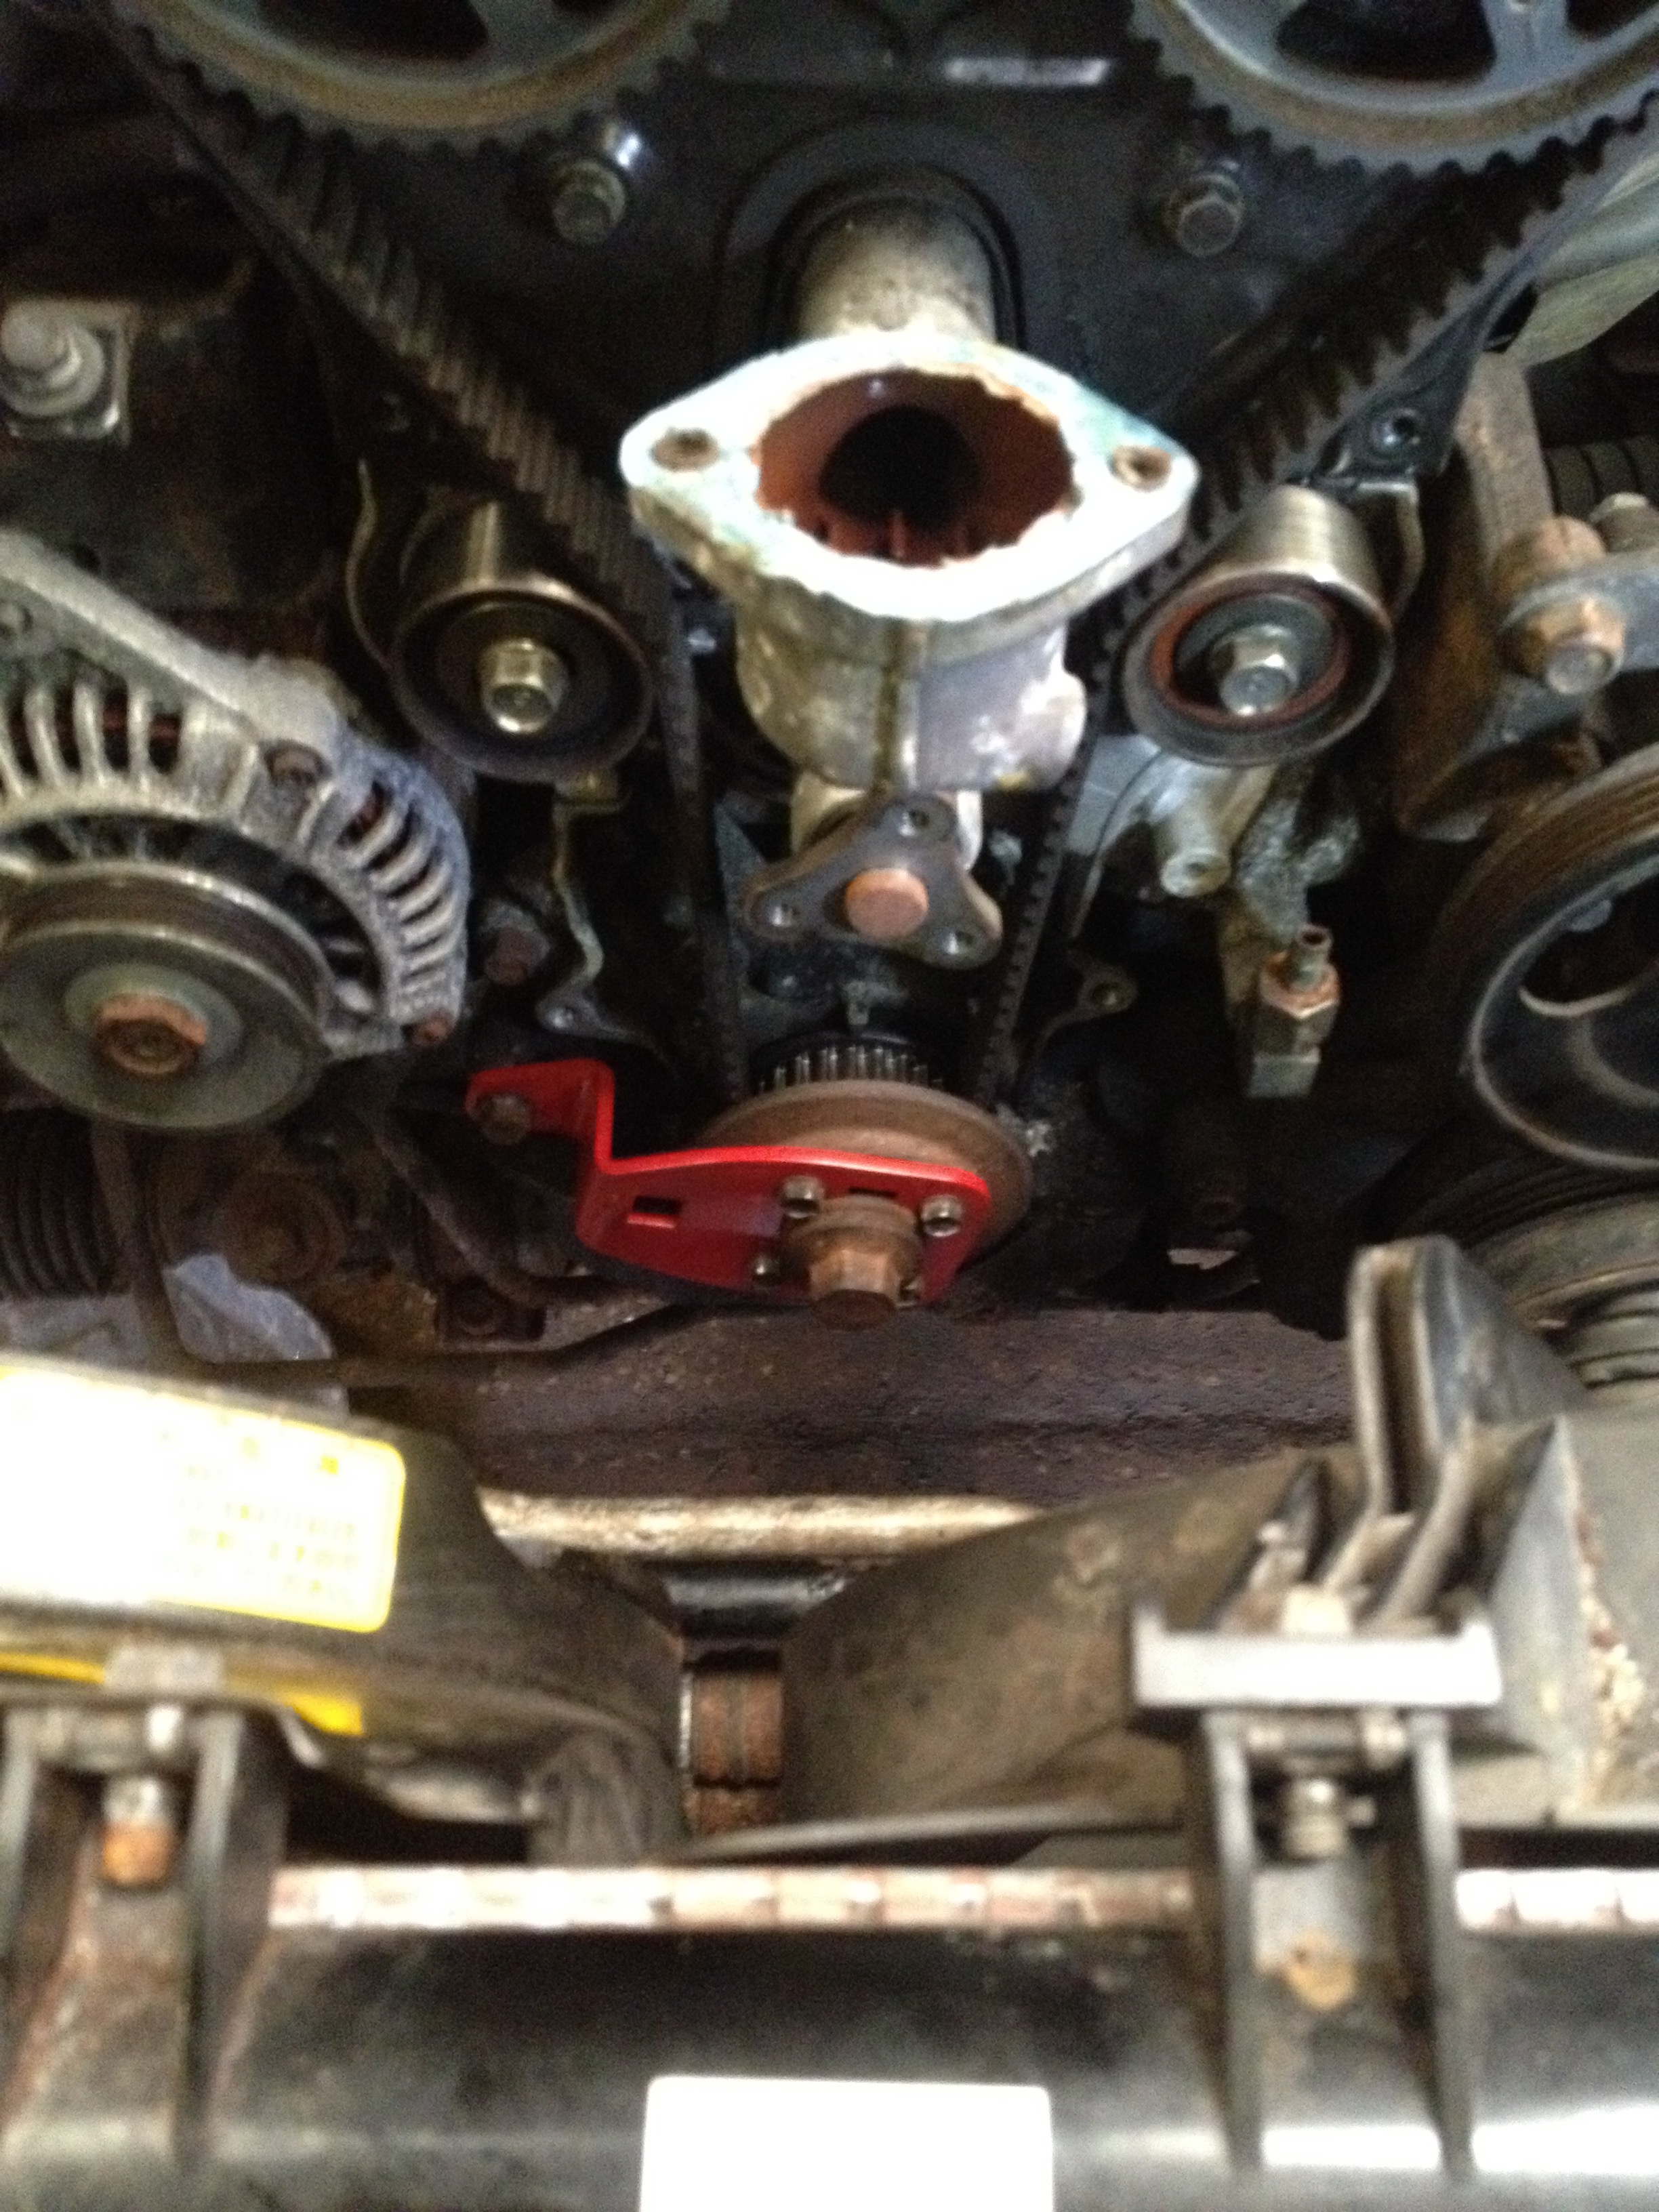
IMG_2959.jpg (1.5 MiB) Viewed 3470 times


...before refitting it loosely and resetting everything back to TDC with the crank lock removed.

Waterpump inlet bolts are tricky to see...
IMG_2962.jpg
IMG_2962.jpg (1.91 MiB) Viewed 3465 times


Thermostat housing, waterpump off, then decision time on the cam and crank seals, decided to go for it. Seals were very brittle and were breaking up so glad I did. In the end very carefully used a spikey hook tool to stab them (gentle taps with a hammer) and then pull them out. Crank one was the trickiest as you are working at arms length.
Cam...
IMG_2964.jpg
IMG_2964.jpg (1.52 MiB) Viewed 3465 times


Crank...
IMG_2967.jpg
IMG_2967.jpg (1.58 MiB) Viewed 3465 times


Water pump inlet (need to remember to put this in position before fitting the waterpump)...
IMG_2970.jpg
IMG_2970.jpg (1.15 MiB) Viewed 3465 times


O-ring fitted...
IMG_2969.jpg
IMG_2969.jpg (1.63 MiB) Viewed 3465 times


Water pump fitted (pic was taken before I realised I should have put the inlet back in place first!)...
IMG_2968.jpg
IMG_2968.jpg (1.16 MiB) Viewed 3465 times


Stopping for tea again... ;)
User avatar
sandmonster
Regular
Posts: 68
Joined: Mon Oct 19, 2015 4:26 pm
Location: Sunny Salford

Re: waterpump/cambelt etc replacement howto?

Postby sandmonster » Thu Mar 24, 2016 8:54 am

Part II as the edit has timed out...

All new seals in and waterpump housing back on (o-ring for the waterpump housing was very slim compared to the groove, would have thought it would be a bit fatter - should have taken a pic - grr - but its too late now and it seems to hold water)
IMG_2971.jpg
IMG_2971.jpg (1.27 MiB) Viewed 3463 times


Recheck the alignment after refitting the sprockets..
IMG_2972.jpg
IMG_2972.jpg (983.1 KiB) Viewed 3463 times

IMG_2974.jpg
IMG_2974.jpg (1.53 MiB) Viewed 3463 times


Belt back on...
IMG_2975.jpg
IMG_2975.jpg (1.63 MiB) Viewed 3463 times


Difference between Mazda thermostat gasket (bottom) and the pattern part one that came with the pattern waterpump ...
IMG_2976.jpg
IMG_2976.jpg (1.45 MiB) Viewed 3463 times


CAS off, cleaned up and refitted (panicked a bit as I thought I'd rubbed off my alignment marks getting a bit giddy with the old brake cleaner, but could just see them). The old o-ring just crumbled away and the new one was obviously much fatter and juicier. Needed a bit of heave-ho to get it back in. Pic of the attachment bolt too...
IMG_2977.jpg
IMG_2977.jpg (1.24 MiB) Viewed 3463 times

IMG_2978.jpg
IMG_2978.jpg (902.61 KiB) Viewed 3463 times


I forgot to take any more pics at this point.. but cleaning up the cam cover took a while as whoever had taken it off last time had used silicone seal around the whole gasket so fiddly bits of silicone to clean off. That went back on OK.
Then all pipes and hoses, got myself a set of silicone hoses and replaced most of those as we went. Was running out of time so although we tried to get the heater hoses off the clip on the inboard hose was proving a little bugger to get to even with my mate's set of fancy 'remote' hose clip pliers. so that job was left for another day.
Everything else went back on smoothly and (apart from a minor brain freeze with the spark plug leads, even after checking them against Tomm's :eek: ) she started up first time. Just a little bit of a whine from the belt, so may need to redo the tensioning if it doesn't settle down with use.
:auto-layrubber:

Return to “MK1 -1989 > 1997 (NA)”

Who is online

Users browsing this forum: No registered users and 5 guests