 />
/> />
/>  />
/> 

The headlamps on my 1994 1.8 Eunos recently stopped popping up when I switched on the headlamps or flashed the lights. The button on the dashboard would raise the lamps but they would not raise or lower automatically when using the stalk. I briefly got them functioning again by tapping the relay under the dashboard but this was short lived and they played up again! I'm guessing this relay has been faulty for some time as I can recall driving along at night and the headlamps randomly drop or they ended up with a mind of their own popping up and down repeatedly!
Anyway, I have managed to fix the fault with nothing more than a soldering iron and I've documented the whole repair process to help other owners and save yourself £60 by avoiding having to buy a new relay! It's a very straight forward job :D
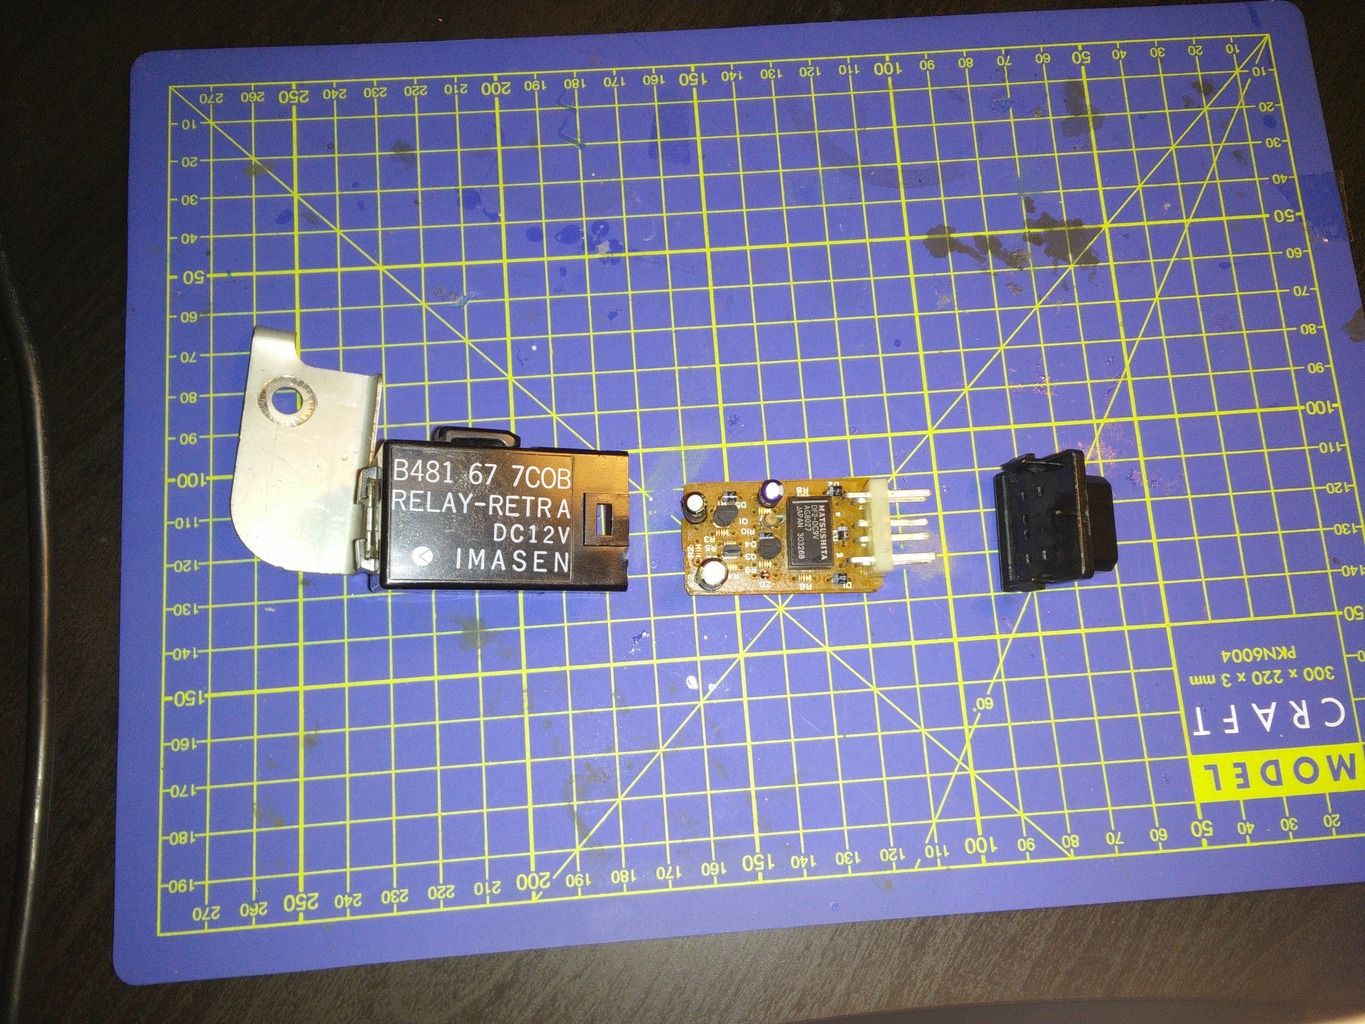
Please note this fix applies to cars with the retractor relay located in the drivers footwell (part number B481 67 7C0B). I cannot vouch for other configurations where the relay is located in the engine bay but I imagine the same fix would apply.
The Symptoms
This common fault usually stops the headlamps raising up when turned on from the stalk and/or retracting back down if the using the dashboard button.
The Cause
Based upon my findings this evening, the cause of the relay failure is down to dry solder joins witnessed on the actual PCB relay board. The solder joints can fracture over time, and as they fracture, they cause a tiny arc between the PCB and the PCB components. Over time this fracture oxidises causing an electrical barrier between the PCB and relay. The good news is its really easy to repair :)
Tools for the Job
You will need -
- 10mm spanner or ratchet
- A small flat bladed screw driver
- A soldering Iron
- Some Solder (optional)
- A magnifying glass (optional)
- A workstand to hold the PCB board (optional)
The Fix
1) Start by unplugging and unbolting the relay from the car by removing the 10mm bolt with your spanner or ratchet.
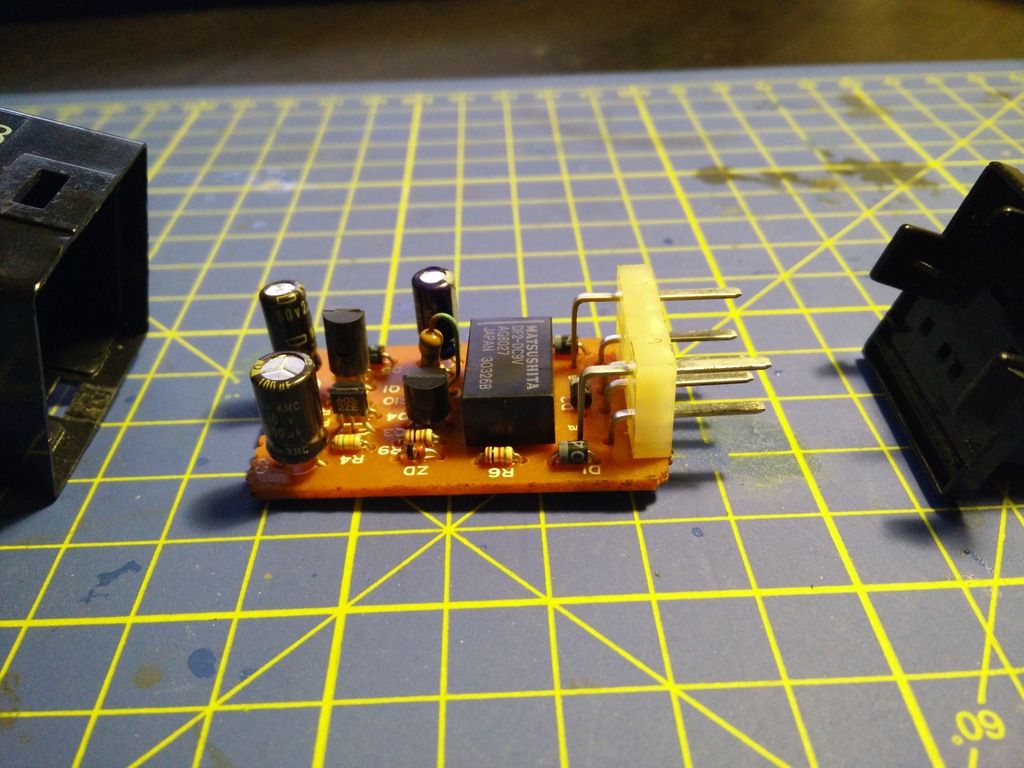
2) Take your relay to your work bench and using your flat bladed screw driver, remove the connection cover from the relay assembly and pull out the PCB carefully avoiding bending any of the connector pins. You should end up with the following -
[url="http://s6.photobucket.com/user/p3boy/media/IMG_20160409_231807_zpsnj1unowr.jpg.html"]
 [/url]
This is the PCB
[url="http://s6.photobucket.com/user/p3boy/media/IMG_20160409_231840_zps7zd5jtun.jpg.html"]
 [/url]
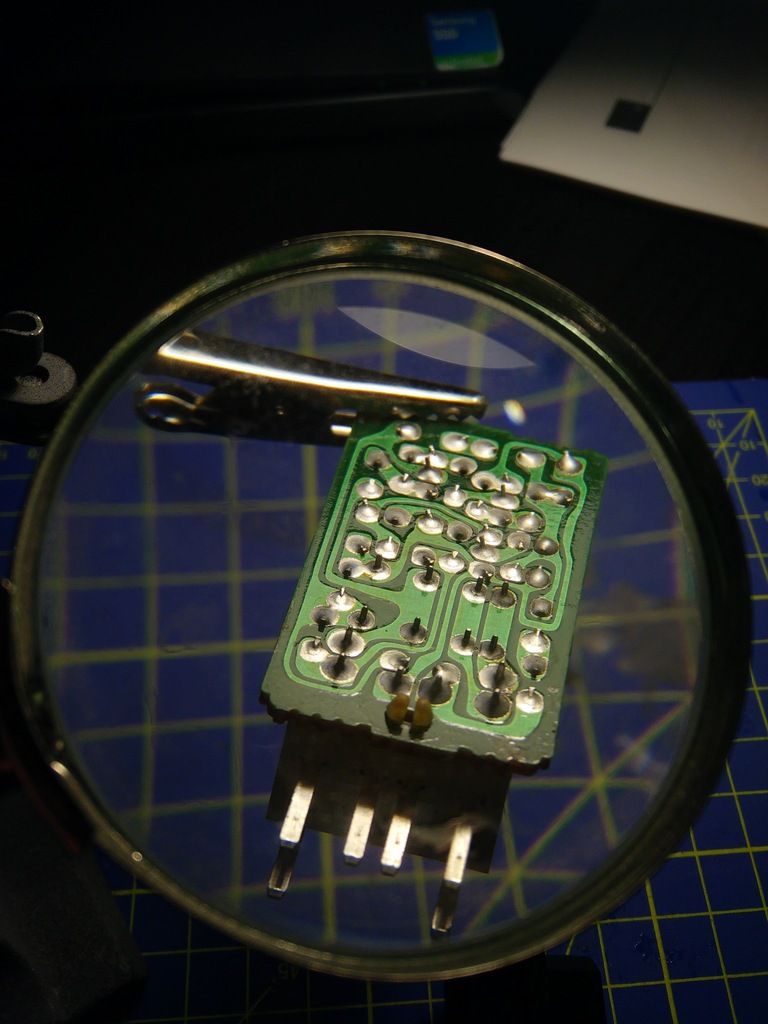
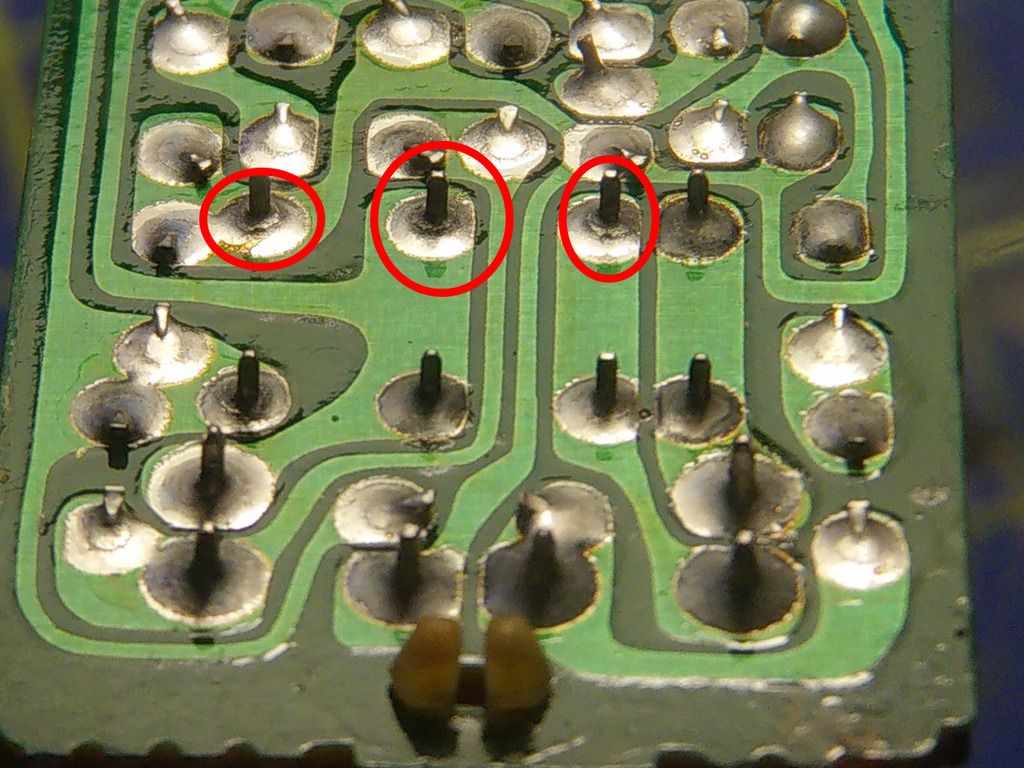
3. If you have a magnifying glass, inspect the soldered joint for any signs of dry solder joints. In the images below, I've cropped and circled the dry solder joins, easily identifiable by a black ring around the component leg. It's very difficult to see the oxidisation with the naked eye
[url="http://s6.photobucket.com/user/p3boy/media/IMG_20160409_232038_zpstoat958h.jpg.html"]
 [/url]
Closeup of the above image circling the oxidised dry joints causing the fault
[url="http://s6.photobucket.com/user/p3boy/media/closeup_zpsbm4seydl.jpg.html"]
 [/url]
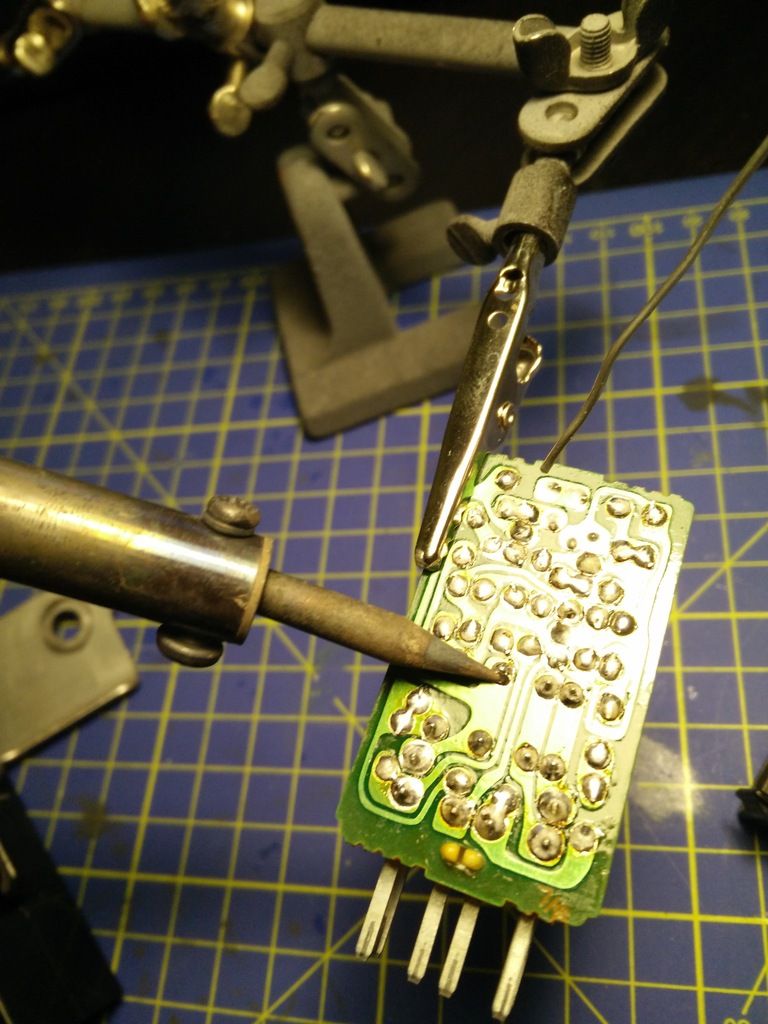
4. Place your PCB carefully in the holder then take your soldering iron and reheat each component leg on the board to "reflow" the original solder. I also applied a little bit of fresh solder to every component on the PCB to avoid future failures. Its worthwhile doing as its very easy to work on. This process will remelt the solder ensuring all dry joints are eradicated and a good solid connection is restored to all components.
[url="http://s6.photobucket.com/user/p3boy/media/IMG_20160409_232908_zpsq94vadgr.jpg.html"]
 [/url]
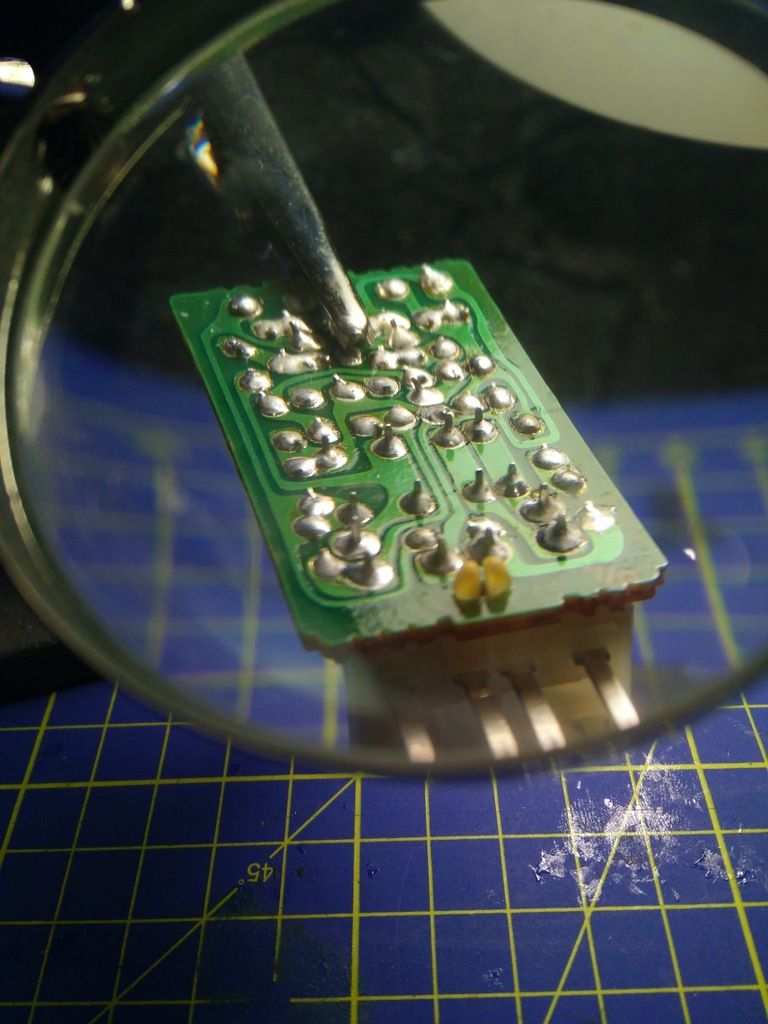
5. Inspect your fine handy work. Here is my PCB after reflowing
[url="http://s6.photobucket.com/user/p3boy/media/IMG_20160409_233112_zpsixyjai7h.jpg.html"]
 [/url]
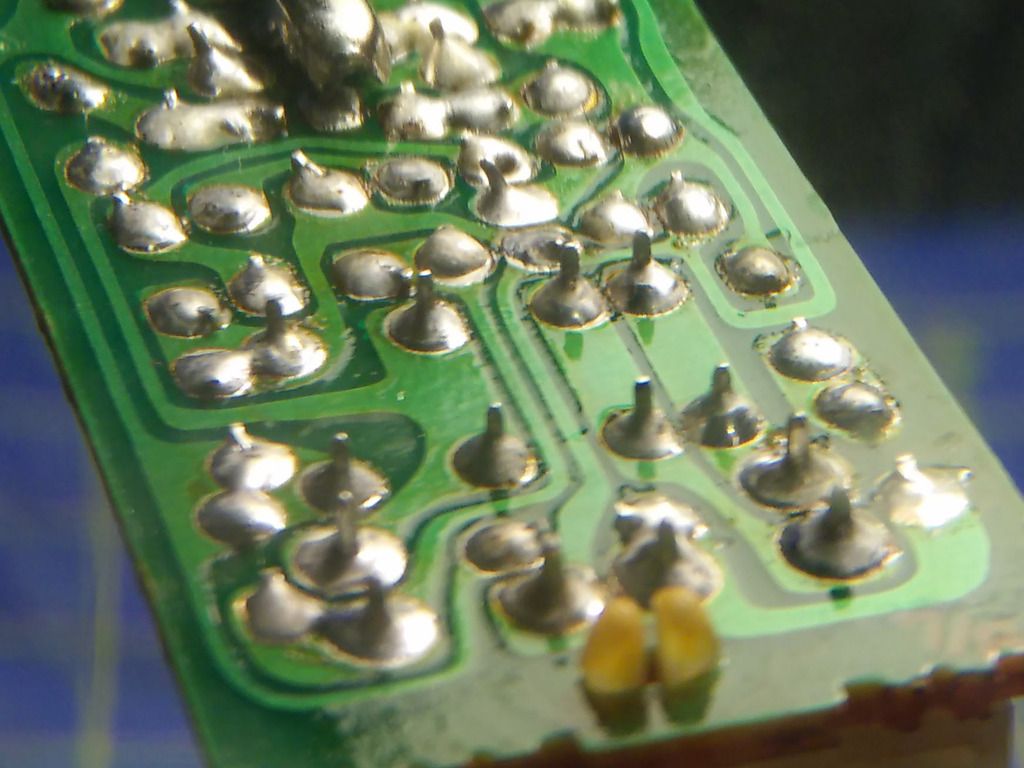
Close up of the freshly reworked PCB. As you can see, the black ring around the legs has now gone meaning the dry joint has been repaired.
[url="http://s6.photobucket.com/user/p3boy/media/closeup%20after_zpsw4r7xw2c.jpg.html"]
 [/url]
6. Reinstall the PCB into the relay housing and refit the terminal cover. Be careful not to bend any of the connector pins during the rebuild.
7. Before bolting the relay back in position under the dashboard, connect the relay into the plug and test your lights by flashing the stalk and activating both dipped and main beam. MAKE SURE THE DASH BUTTON IS RESET SO THE LIGHTS WILL RETRACT AS NORMAL.
Here is a quick (and very poor) video of the outcome - All fixed and functioning perfectly :)
[media]https://www.youtube.com/watch?v=skDn532rK0o&feature=youtu.be[/media]
Hopefully this guide will save some owners the trouble of sourcing a new relay. I cannot guarantee it will fix every headlight problem but it has cured my car's fault 100% :)

